How to Install Threaded Inserts?
Leading Rivet Nut Manufacturer and Supplier in China
Installing threaded inserts correctly is essential to ensure strong, durable, and reusable threads in wood, plastic, or metal components. If you’re wondering how to install threaded inserts for different materials and avoid common pitfalls, this step-by-step guide will walk you through everything you need to know — from selecting the right insert type to mastering installation techniques with precision.
Table of Contents
What Are Threaded Inserts?
Threaded inserts are fasteners used to create strong internal threads in various substrates. They are typically employed in materials that cannot be threaded directly or have low thread strength, such as wood, plastic, aluminum alloy, thin steel plates, etc. The primary purpose of their design is to enhance the mechanical strength of the connection point, and they are particularly suitable for structures that require frequent disassembly or long-term load-bearing.
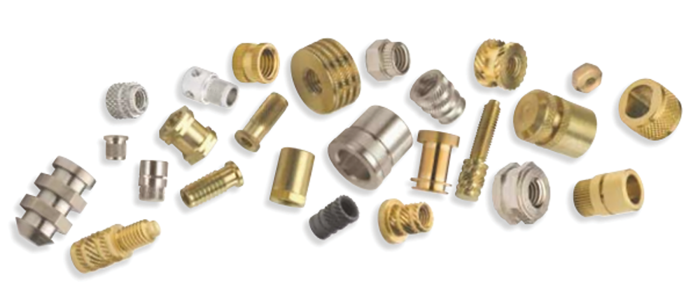
Depending on the substrate and application method, threaded inserts can be classified into various types such as press-in type, hot-melt type, self-drilling type, and riveting type. Through the appropriate installation method, the inserts can firmly bond with the substrate, providing stable and reliable internal threads for bolts or screws, thereby significantly enhancing the connection strength and durability.
Applicable materials include:
- Wooden materials (plywood, solid wood, particle board, etc.): Suitable for installing threaded wood inserts, used for furniture, structural components, etc.
- Plastic (ABS, PC, PA, etc.): Commonly used for hot-melt or ultrasonic inserts to enhance the connection stability of plastic parts.
- Metal (aluminum, thin steel, stainless steel, etc.): Applicable for repairing damaged threads or providing higher strength internal threads.
- Industrial equipment: Reliable bolt connections in the housing and mechanical structure
- Consumer electronics: Such as laptop computer shells, embedded hot-melt copper inserts in printer brackets
- Furniture manufacturing: Connecting components for wooden structures to enhance the stability of repeated installations
- Automotive and aerospace industries: Enhancing the strength of fastenings in composite materials or thin-walled metals
By selecting and installing the right type, threaded inserts can not only enhance the structural reliability but also effectively extend the product’s service life. They are indispensable key components in modern assembly manufacturing.
Why Use Threaded Inserts Instead of Screws?
In many structural connections, using screws directly may seem convenient, but in the long term, there are often problems such as insufficient connection strength, thread wear, and slippage. Thread inserts, as an alternative solution, can significantly improve the connection quality and service life, and are particularly suitable for applications with high requirements for strength and repeated disassembly.
Enhance the connection strength
Threaded inserts are usually made of metals (such as brass, stainless steel, and carbon steel). Compared to directly tapping threads in wood or plastic, their internal threads have higher strength and greater load-bearing capacity. When subjected to axial tension, torsion, or shear force, the inserts provide a more robust support, reducing the risk of screw loosening or breakage.
Excellent anti-slip performance, reusable
Drilling threads directly in wood or plastic and repeatedly screwing in the screws can easily cause damage to the threads. However, embedded threaded inserts have excellent wear resistance. Even if they are frequently disassembled and reassembled, they can maintain the stability of the thread structure, are less likely to slip, and extend the service life.
More friendly to soft materials
For soft materials such as wood and plastic, using threaded inserts can prevent the materials from cracking, deforming or breaking due to stress concentration. The external threads or hook designs of the inserts can firmly grip the substrate, forming a stable internal threaded system, which does not rely on the material’s own strength. It is particularly suitable for furniture assembly, plastic shells and other fields.
Compared with traditional screws, threaded inserts not only significantly enhance the connection reliability, but also solve problems such as repeated disassembly and insufficient material strength. They have become the preferred fastening solution in modern assembly processes.
How To Choose the Right Type of Threaded Inserts?
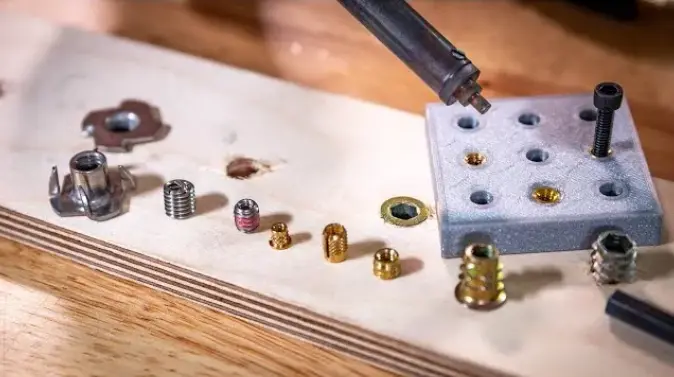
a. Heat-Set Inserts
The hot-melt inserts are specifically designed for thermoplastic materials such as ABS, PLA, and nylon. During installation, the inserts are heated using a soldering iron or a hot-melt device, causing the plastic to soften and be pressed into the material. After cooling, they are firmly fixed in the substrate. These inserts usually have spiral patterns or hook structures on their surfaces, which help enhance the mechanical locking force. They are commonly used in:
- 3D printed parts for fixing screws
- Injection-molded housing products for structural connections
- Installation of small electronic device housings
Heat-Set Inserts are stable in shape, resistant to repeated disassembly and loosening; however, they have a requirement for heat-melting properties of the material and are not suitable for thermosetting plastics.
b. Self-Tapping Inserts (Self-Drilling Inserts)
Self-drilling inserts have the self-cutting function. They have sharp external threads and can be directly screwed into materials without pre-drilled threads to form a stable threaded connection. They are suitable for soft materials such as wood, plastic, and aluminum, and are particularly suitable for industrial batch production with high assembly efficiency requirements. They are commonly used in:
- Reinforcement of the structure of wooden furniture
- Strengthening of the threads in plastic components
- Assembly of plastic shells for electronic devices
The features include quick installation, no need for special equipment, and reduced labor costs; however, it is suitable for materials with lower strength and cannot be used for high-hardness metals.
c. Press-Fit Inserts
The embedded inserts rely on their external rolling patterns or barbs to be pressed into soft materials (such as wood, plywood, composite boards, etc.) by mechanical pressure, without the need for heating or thread tapping. They are tightly fitted with the substrate through frictional force and are suitable for medium-load application scenarios. They are commonly used in:
- Furniture manufacturing and assembly
- Mechanical fastening of wooden structural components
- Reinforcement of wood fixation points in interior decoration
Press-Fit Inserts are easy to install and do not require power tools. They can be manually pressed in. However, there are certain requirements for the material density; if it is too soft, it may come off easily.
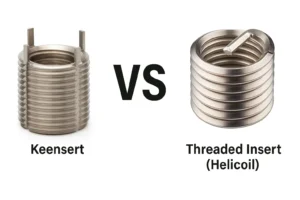
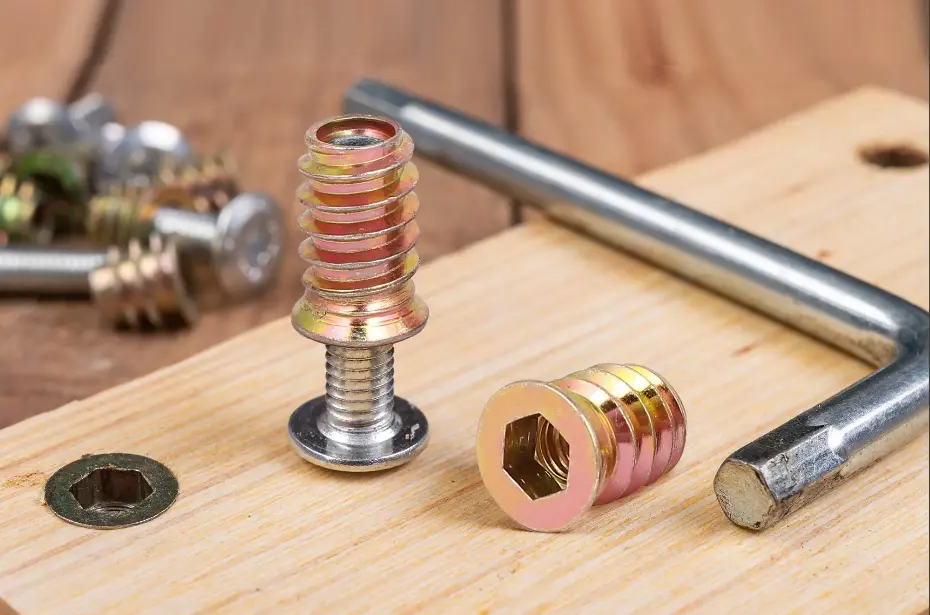
d. Threaded Rivet Nuts
Also known as rivet nuts, it is a threaded solution designed for thin-walled materials. During installation, the insert is expanded and locked onto the back of the material using a riveting tool, achieving a single-sided installation while providing a reliable threaded connection. It is widely used in metal plates, composite materials, and hollow structures.
- Automotive sheet metal component connection
- Industrial chassis and cabinet assembly
- Building hardware and light steel structure installation
The advantages of rivet nuts are that they provide a stable structure after installation, possess excellent tensile strength and shear performance, and are suitable for large-scale industrial applications; however, they need to be used in conjunction with specialized riveting tools.
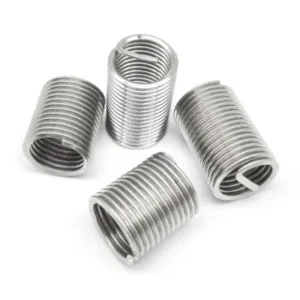
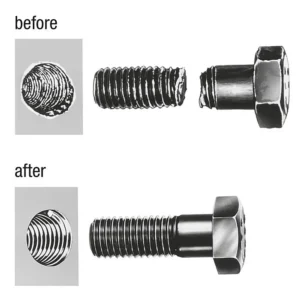
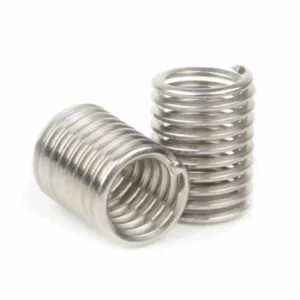
The wire nut is made by winding high-strength stainless steel wire into a spiral structure. It is usually used in metal substrates. Before installation, the internal thread needs to be drilled in the base material. After installation, it forms a high-precision and high-strength internal thread. It can repair damaged screw holes or enhance the load capacity of the original thread.
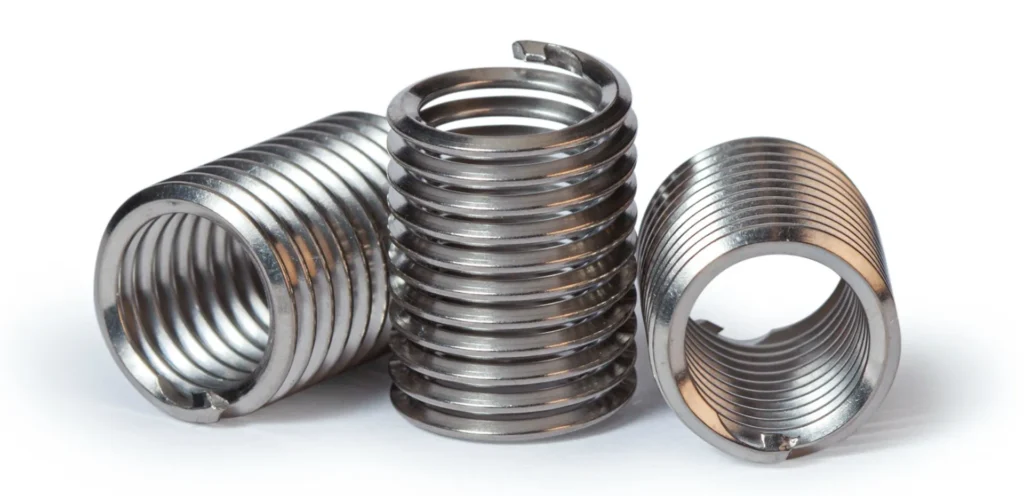
- High-strength connections for aviation and military equipment
- Repair of engine bodies and aluminum alloy structures
- Maintenance and reinforcement of screw holes for high-frequency disassembly and assembly
Wire threaded inserts can enhance the service life of the threads, possess excellent vibration resistance and wear resistance, and are suitable for high-stress applications; however, they have certain requirements for installation accuracy and operational techniques.
How to Choose the Right One?
In different materials and application scenarios, choosing the appropriate insert type is of vital importance. The following four elements can serve as reference for decision-making:
①. Base Material Type
The structural design and installation methods of inserts vary depending on the type of substrate:
- Wood: The wood has a relatively soft texture and is prone to cracking or splitting. It is recommended to use self-tapping inserts with a spiral cutting structure, which can be directly screwed in without damaging the structure; or choose push-in inserts with barbs/embossing designs, ensuring secure anchoring through mechanical pressing.
- Plastics (especially thermoplastics): The hot-melt inserts are highly suitable. After heating, they are integrated into the plastic, and upon cooling, a tight molecular lock is formed. They are commonly used in 3D printing and injection molded parts. For harder engineering plastics, considering the self-tapping inserts can also improve efficiency.
- Metal or thin-walled sheet: For materials with high strength but thin thickness, such as sheet metal, aluminum plates, and composite materials, it is recommended to use threaded riveting inserts (rivet nuts) for fixation through riveting. For high-strength base materials (such as aluminum parts and steel parts), steel wire sleeves can be used to enhance the thread strength or repair wear.
②. Load Requirements
Based on the type and magnitude of the load that the connecting parts need to bear in the usage scenario, select the appropriate insert structure:
- High-tension/Shear Force Application: For situations such as automotive components, industrial equipment, and structural fixation, it is recommended to use rivet nuts or steel wire sleeves made of metal. These materials are more stable when subjected to high loads, have strong anti-pulling-out force, and are less likely to loosen.
- Light-load or decorative connections: For daily household items, plastic casings, and 3D-printed structures, commonly using hot-melt inserts or light-duty self-tapping inserts can meet the requirements and have lower costs.
③. Installation Method & Equipment
Based on whether the site has the necessary tools, select the more suitable type of insert:
- Have a hot press machine or an electric riveting gun: You can choose to install either the thermally fused inserts (suitable for plastics) or the rivet nuts (suitable for metals), which are highly efficient and structurally reliable. They are particularly suitable for standardized assembly processes and batch operations.
- No dedicated equipment or on-site assembly scenarios: It is recommended to choose self-tapping inserts or push-in inserts, which can be installed manually or with the help of simple tools. They are suitable for maintenance, DIY projects or initial production scenarios.
④ Reusability Requirements
Whether the connecting parts need to be frequently disassembled and reused is also a key factor in the selection process:
- Frequent Disassembly Scenarios: For items such as industrial maintenance interfaces, mold structures, and replaceable components, it is advisable to choose metal inserts that are resistant to wear and do not slip. Examples include stainless steel self-tapping inserts, brass hot-melt inserts, or steel wire screws, to ensure that each connection remains tight.
- Single-use or infrequent use: You can choose either the relatively cost-effective hot-melt type or the conventional push-in type plastic inserts, which can fulfill the basic fixation function.
What Tools Needed to Install Threaded Inserts?
Common Installation Tools Classification
1. Manual Tools
(Suitable for Small-scale Installation or Simple Structures)
- Hex key wrench / screwdriver: Used for installing self-tapping and press-fit inserts, it can be screwed or pressed in manually.
- Installation screw + double nuts: A simple method for installing threaded riveted inserts, suitable for non-batch operations.
- Hammer + tool holder: Used for press-fit inserts, it uses impact to press the insert into wood or soft materials.
2. Heating Tools
(Suitable for Thermosetting Inserts)
- Electric soldering iron / Hot pressing equipment: After heating the insert, it is pressed into the thermoplastic material, and after cooling, a firm connection is formed.
- Temperature-controlled hot press machine: Suitable for mass assembly, with precise temperature control, avoiding plastic burning or deformation.
3. Specialized Installation Tools
(Suitable for Industrial Assembly or Mass Production)
- Manual Rivet Nut Gun (Spin-Spin / Spin-Pull Type): Used for installing rivet nuts, facilitating control of deformation quality.
- Pneumatic or Electric Rivet Nut Gun: More efficient, suitable for assembly line operations.
- Threaded Sleeve Installation Tool: Suitable for inserting steel wire screws, used in conjunction with tapping tools to ensure accuracy.
Pre-installation Checks and Preparation Matters
Before the official installation, it is recommended to complete the following preparatory steps to ensure a smooth installation and reliable connection:
- Confirm the size and depth of the base material
- Check whether the pre-drilled hole dimensions meet the specifications of the insert (if too small, it may not fit; if too large, it may become loose).
- Ensure that the hole depth is sufficient for the installation length of the insert, avoiding the insertion of the insert protruding or being misaligned.
- Remove burrs and clean the residual substances inside the hole
- Use a file or brush to clean the hole opening to avoid sticking or inaccurate positioning during installation.
- Keep the hole dry and free of oil stains to enhance the friction between the insert and the base material or the adhesive effect.
- Confirm the condition of the installation tools
- Check if the tools are in good condition, such as whether the soldering iron temperature is stable and if the rivet nut gun is properly clamped.
- If necessary, conduct a trial installation to ensure that the assembly torque or riveting deformation meets the requirements.
- Safety protection measures
- Wear goggles and gloves when using electric or pneumatic tools.
- When operating high-temperature tools (such as hot melt), keep away from flammable materials and set up heat protection measures.
Step-by-Step Installation Guide: How to Install Threaded Inserts?
- Electric soldering iron / Hot pressing equipment: After heating the insert, it is pressed into the thermoplastic material, and after cooling, a firm connection is formed.
- Temperature-controlled hot press machine: Suitable for mass assembly, with precise temperature control, avoiding plastic burning or deformation.
5.1 For Wood
Recommended Insert Type:
- External thread self-tapping type (such as E type)
- Hexagonal pressing-in type or hammering-in type
Installation Steps:
- Drilling:
Select a suitable drill bit based on the outer diameter of the insert. Usually, it should be slightly smaller than the outer diameter of the insert by 0.1 to 0.5 mm. It is recommended to use a vertical drilling platform to ensure the hole is vertical. - Deburring and Cleaning:
Use a deburring tool to clean the edge of the hole to ensure there are no foreign objects inside. - Installation Method:
Self-tapping type: Use an internal hexagonal wrench or installation tool to screw the insert into the hole.
Press-in type: Use a rubber hammer or press machine to press the insert vertically into the hole. - Precautions:
The depth of the drilling should be slightly greater than the length of the insert to avoid cracking at the bottom.
For plywood and density board, it is recommended to choose a coarse pitch insert to enhance grip.
5.2 For Plastic
Recommended Insert Type:
- Hot pressing type
- Ultrasonic type
- Self-tapping type (for engineering plastics)
Installation Steps:
- Drilling:
The hole diameter is slightly larger than the outer diameter of the insert by 0.05 to 0.2mm (adjust according to the hardness of the plastic). - Cleaning the hole:
Ensure there is no oil residue or burrs, and avoid bubbles or eccentricity during hot pressing. - Installation methods:
Hot pressing type: Use a temperature-controlled soldering iron or hot melt machine to slowly press the insert into the hole, ensuring uniform heat conduction. Ultrasonic type: Utilize an ultrasonic welding machine, where the embedded part is melted into the plastic through high-frequency vibration. Self-tapping type: Slowly screw the insert into the plastic with a wrench; do not over-tighten to prevent material cracking. - Precautions:
Excessive heating of the plastic will cause edge melting or shrinkage. After installation, allow it to cool for more than 30 seconds to ensure the embedded part is firmly fixed.
5.3 For Metal
Recommended Insert Type:
- Threaded Rivet Nuts
- Wire Thread Inserts
Installation Steps:
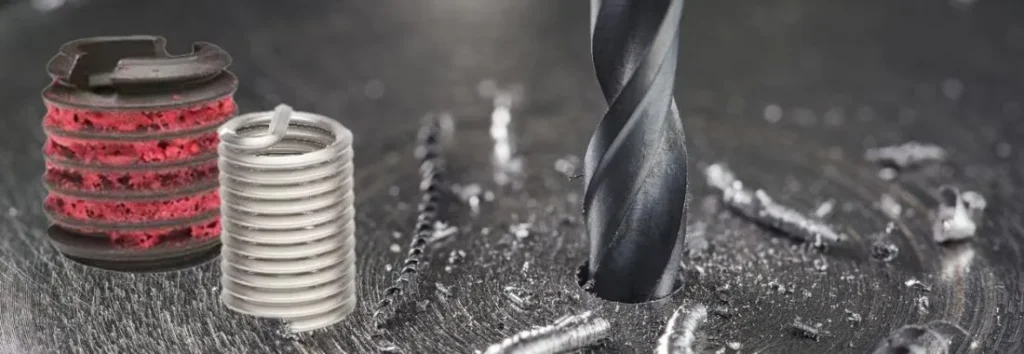
A. Installation of Wire Thread Inserts (Applicable to Aluminum, Copper, Steel, etc.)
Drill and thread: Drill the hole according to the specification of the sleeve (e.g., for an M6 sleeve, drill a 6.3mm hole and thread it with M6x1) and then thread it.
Clean the hole: Blow out the remaining debris in the hole with compressed air.
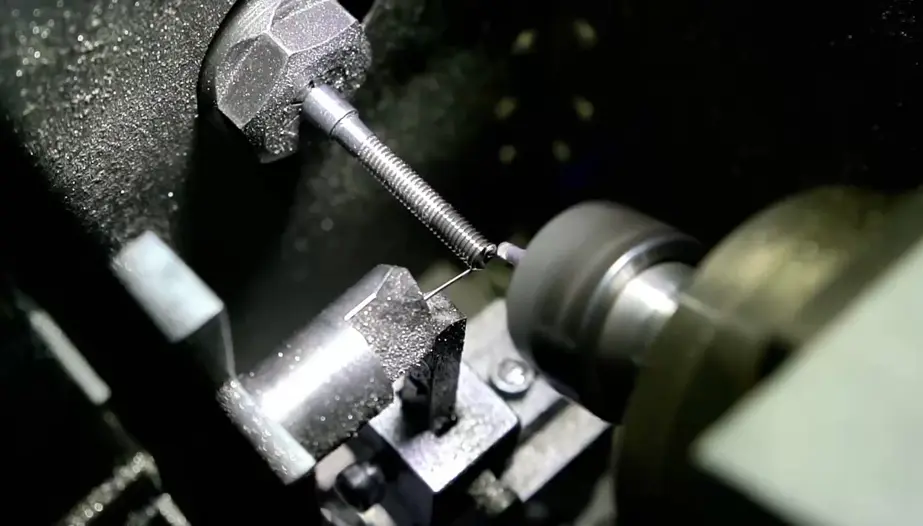
Install the sleeve: Use a special wrench to screw the sleeve into the hole all the way in.
Break off the tail: Use a tail breaker to break off the end of the installation handle (for tail-shaped sleeves, use a dedicated tool).
Notes:
During threading, keep the thread vertical and clean, and avoid getting stuck or misaligned. It is not recommended to install directly in an uncleaned hole.
B. Installation of Bolts (Applicable to Thin-Walled Components such as Sheet Metal)
- Drilling: Drill holes according to the outer diameter specification of the rivet nut (e.g., for M5 rivet nut, typically drill a hole of 7.1-7.3mm).
- Inserting the Rivet Nut: Insert it into the hole, with the flange touching the surface of the board.
- Riveting with Special Riveting Gun: Start the riveting tool and expand the nut to fix it on the back of the board.
- Notes:
If the hole diameter is too large, it will cause rotation and slipping; if it is too small, it will be difficult to insert. The riveting tool should be adjusted according to the material to control the pulling force to prevent bursting or deformation.
What Are Common Installation Mistakes And How to Avoid?
① The hole size is inappropriate
Diameter deviation is one of the most common problems. If the hole is drilled too large, it will cause the insert to be unable to be firmly fixed, resulting in the risk of rotation or loosening; conversely, if the hole diameter is too small, it may cause damage to the insert or the substrate during installation. For example, for a M6 self-tapping insert, the recommended pre-drilled diameter is 8.9mm ± 0.1mm. If the deviation exceeds ±0.2mm, the tensile strength will drop by more than 15%.
The solution is to strictly follow the pre-drilled hole size table provided by the manufacturer, use a sizing drill bit, and combine with a positioning device to control the depth and verticality of the drilling.
② The insertion angle is not perpendicular
When the insert is not inserted vertically into the hole, it will cause the axis of the thread to deviate, making subsequent screw installation difficult, and even leading to uneven loading resulting in detachment or fracture. Especially when using self-drilling or pressing-type inserts, if the insertion angle deviation exceeds 5°, it will result in insufficient engagement depth, affecting stability.
It is recommended to use auxiliary fixtures or vertical positioning tools for installation to ensure that the thread direction is perpendicular to the surface of the workpiece.
③ Improper control of the hot-melt temperature and time (for plastic substrates)
When installing thermosetting inserts on plastic parts, if the heating temperature is insufficient, the inserts cannot fully integrate into the plastic, resulting in insufficient grip force; if the temperature is too high or the heating time is too long, it may cause local carbonization and cracking of the plastic, affecting the appearance and mechanical properties of the product. For example, when installing brass thermosetting inserts on an ABS substrate, it is recommended to control the temperature between 280°C and 320°C, with a heating time of approximately 2 to 4 seconds.
In actual operation, the temperature control equipment should be set according to the type of plastic to avoid overheating. At the same time, a constant temperature welding head combined with an auxiliary time controller can be used to ensure consistency.
FAQs About Threaded Insert Installation
1. Can Threaded Inserts Be Reused?
The threaded inserts themselves are reusable and are particularly suitable for high-frequency disassembly and assembly scenarios. As long as the substrate is not damaged and the inserts are not loose, the internal threads can be repeatedly inserted and removed from the screws without affecting the connection accuracy. However, it should be noted that if the usage environment has significant vibrations or load impacts, it is recommended to conduct regular checks to see if they are loose.
2. Can Threaded Inserts Be Removed After Installation?
Most inserts become permanent connections once installed and should not be forcibly removed, especially those of the pressed-in or self-drilling types. If removal is necessary, it is recommended to use professional tools and adopt methods such as reverse rotation or heating for extraction depending on the type of the insert. Thermosetting inserts in plastics can be removed by reheating.
3. What Should I Do If the Insert Is Loose After Installation?
The common causes of loosening include too large a hole diameter, too soft material, or incorrect installation angle. Auxiliary fixation can be achieved using epoxy resin or AB glue to increase the bonding strength. If there are problems in a batch, it is recommended to re-evaluate the hole diameter, tolerance, and installation method, and choose a more suitable insert type, such as the one with external threads or the extended type.
4. What’s the Ideal Hole Size for a Threaded Insert?
The aperture must be strictly set according to the specifications of the insert and the type of substrate.
Taking the M5 self-tapping insert as an example, the recommended pre-drilling aperture is 7.2 – 7.4mm. If it is too large, it will cause rotation loosening; if it is too small, it will lead to cracking of the substrate or failure to insert. It is essential to refer to the manufacturer’s technical drawings and use a positioning drill bit to ensure accuracy.
5. What Tools Are Needed for Proper Installation?
Common tools include electric drills, threaded insertion tools (of screw type or pressing type), hot melt machines (for plastics), positioning fixtures, etc. For rivet nut-type inserts in metal substrates, a special riveting gun is also required. Choosing the appropriate tool based on the type of insert is crucial for ensuring installation efficiency and strength.
Do You Have Any Questions?
Let Us Solve Your Problem
Why Choose Rivetfix for Threaded Inserts?
Rivetfix, as a globally leading supplier of fastening solutions, focuses on the research, development, manufacturing and global distribution of high-performance threaded inserts, and is committed to providing reliable connection solutions for various materials and application scenarios.
- Brand strength is reliable: Rivetfix has over 20 years of industry experience. It serves customers in various fields such as mechanical manufacturing, furniture assembly, and the automotive industry. Its products are sold to markets in Europe, Asia, Southeast Asia, and Australia, and its quality has been widely recognized.
- Support customized solutions: Based on the installation process, structural requirements, and load demands of the customers, we provide personalized design and customization services for threaded inserts, covering multiple aspects such as material, surface treatment, tooth shape, and head shape.
- Global supply chain system: It has storage centers and cooperative factories in China, Australia and Europe. It can quickly respond to the purchasing demands of customers in different regions, achieving short delivery periods, large quantities and flexible supply.
- Technical Support Team: Equipped with an experienced team of engineers, providing full-process technical support including selection suggestions, sample testing, and installation plan optimization, to help customers improve assembly quality and efficiency.
Get High Quality Rivet Nuts Quote!

Send Your Rivet Nut Request
For more than 20 years, Rivetfix has helped customers solve many rivet nuts sourcing needs and technical challenges.
Have a question? Contact us and we’ll provide you with the perfect solution.