How Do You Remove a Damaged Rivnut?
Leading Rivet Nut Manufacturer and Supplier in China

When a rivnut becomes stripped, loose, or broken, it can compromise the integrity of the entire assembly. Whether you’re dealing with a damaged insert in metal, plastic, or composite materials, knowing the right removal method is crucial to avoid further damage. In this guide, we’ll answer the essential question: how do you remove a damaged rivnut safely and effectively. From drilling and grinding to using specialized removal tools, we’ll explore multiple techniques suited for different scenarios and materials.
Table of Contents
What Types of Rivnut Damage Should You Identify Before Removal?

1. Thread Stripping (Bolt Cannot Be Tightened)
This is the most common type of Rivnut damage, characterized by:
- Bolt cannot be tightened: When screwed in, there is no “bite” or resistance, the bolt spins freely without torque feedback.
- Thread slipping with metal debris: Especially after using high-strength bolts or repeated disassembly, the internal threads of the Rivnut wear down, causing thread profiles to become shallow or deformed.
- Unable to secure the fastened parts: The connection loosens and cannot form a stable fastening.
- Causes:
- Multiple reuse causing thread fatigue;
- Using bolts with mismatched size or material;
- Insufficient initial installation pull force, failing to generate enough clamping force.
This type of damage typically requires complete replacement of the Rivnut, as repair cannot restore proper locking performance.
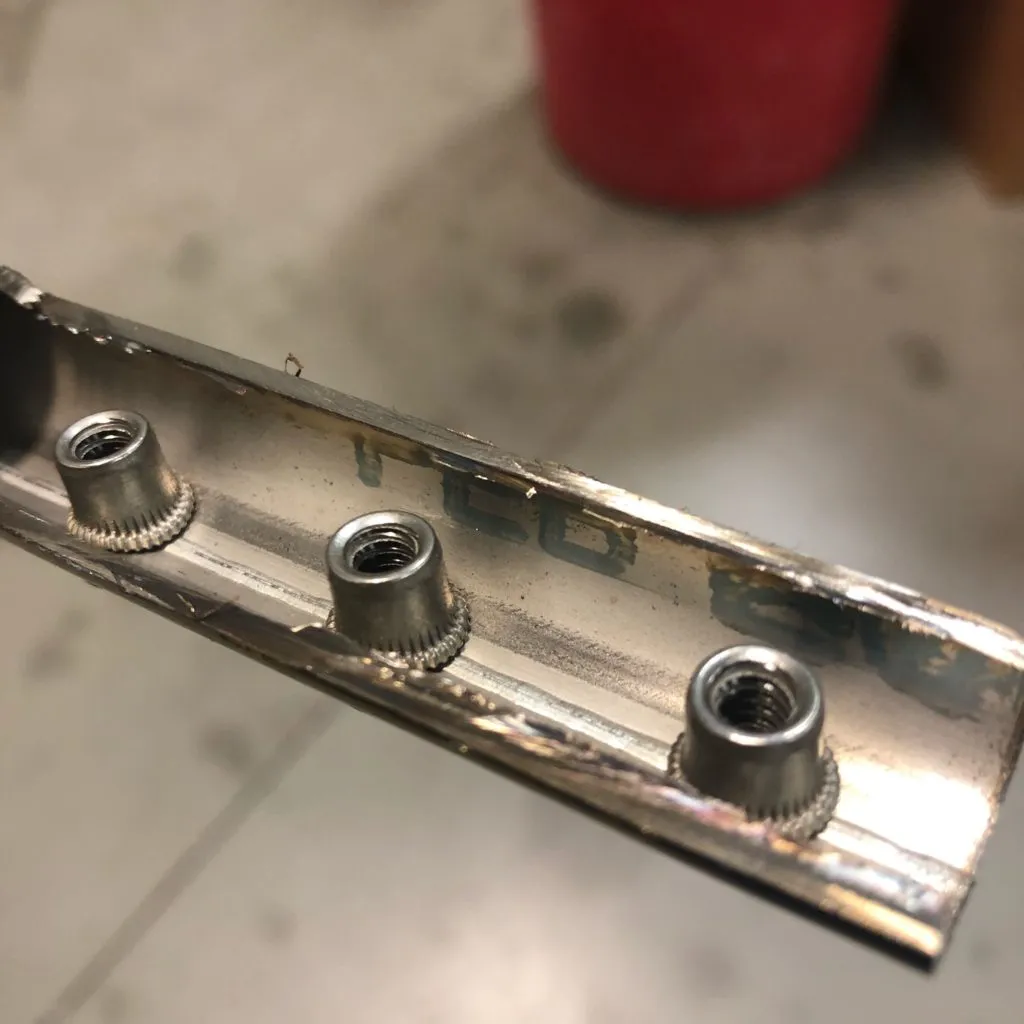
2. Poor Riveting or Free-Spinning
Refers to Rivnuts that fail to form a reliable mechanical lock in the base material after installation, shown by:
Rotates with the bolt: When tightening or loosening the bolt, the Rivnut body also rotates, indicating poor anchoring;
Wobbling inside the hole: Slight movement of the Rivnut detectable inside the hole;
May fall out: Without the formed “lock” shape from the flared tail, it is easy for the Rivnut to pull out from the base material;
Causes:
Insufficient installation tool pull force
If pull force is set too low (e.g., less than 12 kN for steel M6 Rivnut), the tail cannot fully flare;
Manual tools often produce unstable operation and insufficient stroke, so pneumatic pullers with stroke control are recommended;
Recommended pull force ranges for M6 Rivnut:
Aluminum Rivnut: 8–10 kN
Steel Rivnut: 12–14 kN
Stainless steel Rivnut: 15–18 kN

Hole diameter too large, exceeding recommended tolerance
If the Rivnut installation hole szie is beyond the recommended size by 0.1–0.3 mm, interference fit is lost;
Example: Standard steel M6 cylindrical Rivnut recommends hole diameter 9.00 ± 0.1 mm; if hole reaches 9.3 mm or above, sufficient locking force can’t form;
For knurled or serrated Rivnuts, tighter hole tolerance control is needed to ensure the anti-rotation teeth properly bite into the base material.
Insufficient base material strength
For base materials like plastic, ABS, or thin aluminum sheets (<1.0 mm thick, yield strength <150 MPa), insufficient “back pressure” during riveting prevents full tail deformation;
Such materials may exhibit elastic spring-back under riveting load, resulting in incomplete tail flaring;
For low-strength base materials, it is recommended to use large flange Rivnuts or switch to embedded anti-rotation structures (such as hex or knurled bodies).
During removal of this type, special care is needed to prevent the Rivnut from rotating and enlarging the hole; often requires assistance from the back side or cutting.
3. Incomplete Tail Expansion
Incomplete tail forming seriously weakens the Rivnut’s fastening and anti-rotation capabilities, with symptoms including:
Uneven or partial tail flare: The tail does not form the standard “umbrella” or “flange” shape, resulting in insufficient grip area;
Abnormal surface after installation: Noticeable dents or local collapse on the base material’s front surface, indicating asymmetric internal deformation;
Fastened parts loosen or fall off under load: The Rivnut gradually pulls out during use, causing structural failure;
Causes:
Installation tool stroke too short or pull force improperly set
Different thread sizes and materials require different stroke lengths and pull forces for full tail flare. For example:
M6 Aluminum Rivnut: 5.5–7.0 kN pull force, 6.5–7.5 mm stroke
M6 Carbon Steel Rivnut: 8.5–10.0 kN pull force, 7.0–8.0 mm stroke
M6 Stainless Steel Rivnut: 10.0–13.0 kN pull force, 7.5–9.0 mm stroke
Insufficient stroke or pull force causes incomplete tail deformation.
Tail material too hard or manufacturing defects
Rivnuts made from untreated or off-spec raw materials have reduced deformability, requiring higher pull force to fully flare;
For example, some domestic carbon steel Rivnuts with hardness above HV250 may exceed hydraulic tool capacity, causing partial flaring or tail edge distortion;
Solution: choose reputable brands to ensure material consistency and check tail finish quality batch by batch.
Base material thickness exceeds Rivnut’s Grip Range
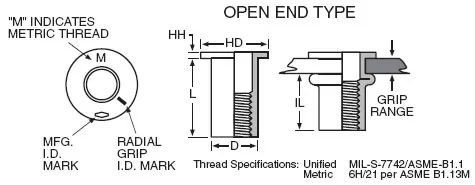
The Grip Range is a key parameter to ensure full tail flare.
Below is a reference table of typical Grip Ranges for various metric Rivnut sizes (cylindrical open-end, carbon steel typical values):
| Thread Size (Metric) | Grip Range (mm) | Recommended Base Material Thickness (mm) | Notes |
| M3 | 0.5 – 1.5 | 0.5 – 1.2 | Small size, light load applications |
| M4 | 0.5 – 2.5 | 0.5 – 2.0 | General purpose, electronics or thin panels |
| M5 | 0.5 – 3.0 | 0.5 – 2.5 | Common in sheet metal structures |
| M6 | 0.5 – 3.0 / 1.0 – 4.5 | 1.0 – 4.0 | Multiple lengths available (standard & long) |
| M8 | 0.5 – 4.0 / 1.5 – 6.0 | 1.5 – 5.0 | Common in machinery, automotive |
| M10 | 1.0 – 5.0 / 2.0 – 7.0 | 2.0 – 6.0 | Requires higher riveting force |
| M12 | 1.5 – 6.0 / 3.0 – 8.0 | 3.0 – 7.0 | Large size, high load use |
Notes:
- These values apply to typical cylindrical open-end Rivnuts; closed-end, hex, or extended types have different Grip Ranges;
- Recommended thickness considers tail flare completeness and pull force margin; middle thickness values preferred;
- If material thickness exceeds max Grip Range, tail cannot fully flare, causing free spinning or failure;
- If material thickness is far below min Grip Range, Rivnut may not seat properly and could be pulled through.
For the working information of Grip range, please refer to the page “Rivet Nut Grip Range Chart“.
4. Rivnut Rotates with Base Material, Bolt Cannot Be Removed
This indicates total loss of anti-rotation function, the hardest to deal with, characterized by:
- Bolt cannot be screwed in or out: Applying torque causes Rivnut and base material to rotate together, no counterforce generated;
- Internal and external threads jammed: Connection fails and bolt cannot be removed;
- Possible surface damage: Repeated torque attempts may cause hole enlargement or base material damage;
- Causes:
- Oversized hole or soft base material (e.g., plastic, plywood);
- Rivnut lacks knurling or hex anti-rotation design, no mechanical anti-rotation feature;
- Tail loosened or spring-backed under load after riveting, causing loosening.
Such faults usually require destructive removal methods, such as drilling out the Rivnut body or cutting the tail flange from the backside for extraction.
How Do You Remove a Damaged Rivnut?
You can choose the appropriate method based on the rivnut’s installation location, material, and extent of damage:
a. Drilling Out Method
Drilling out is one of the most common and effective ways to remove a damaged rivnut, especially when the threads are stripped, the rivet is loose, or the bolt cannot be unscrewed.
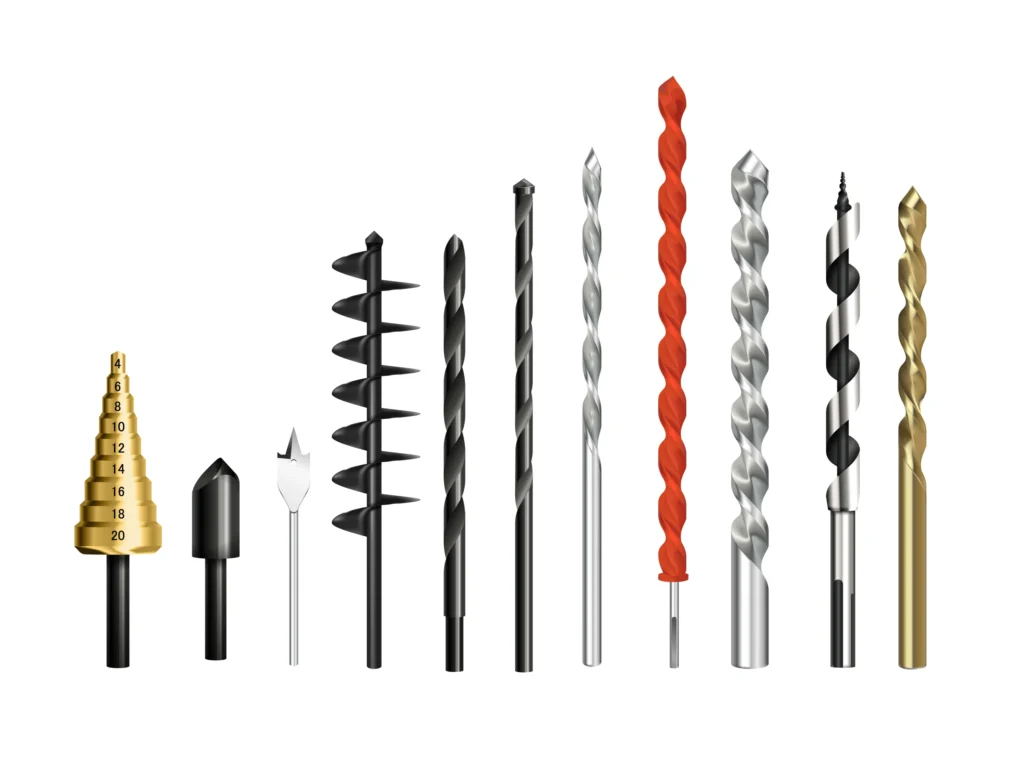
Drill Bit Selection:
The drill bit diameter should generally be 1-2 mm larger than the internal thread diameter of the rivnut to completely destroy the threaded structure. For example:
For an M6 rivnut with an internal thread diameter of about 6 mm, use a 7-8 mm metal drill bit;
For an M8 rivnut, use a 9-10 mm drill bit;
For an M10 rivnut, use an 11-12 mm drill bit.
Speed and Feed Rate:
Use a drill speed of around 1000–1500 RPM to avoid overheating that could deform the base material;
Apply slow and steady feed to ensure smooth cutting, reduce vibration, and prevent excessive hole enlargement.
Drilling Depth:
- Drill to a depth reaching the rivnut’s crimped tail thickness (approximately 5–10 mm, depending on rivnut size);
- Control depth carefully to avoid drilling through the base material or damaging the backside structure.
Removal Process:
After drilling through the rivnut’s crimped tail, the originally firm crimping structure is destroyed;
Then use pliers or needle-nose pliers to easily pull out the loosened rivnut;
For thicker or high-strength materials, you may need to repeat drilling and tapping to remove it fully.
Safety Notes:
Wear safety goggles and gloves to protect against metal shavings;
Avoid applying excessive pressure to prevent drill bit breakage or base material damage;
After drilling, clean the hole edges with sandpaper or a deburring tool to prepare for new rivnut installation.
Practical Case Reference:
In an automotive body repair case, drilling out an M8 stainless steel rivnut took about 30 seconds with high removal efficiency;
Drill bit life varies by material: high-speed steel bits can remove 30-50 carbon steel rivnuts; tungsten carbide bits are recommended for hard stainless steel rivnuts for longer tool life.
b. Cutting Method (Cut-Off or Grinding)
The cutting method is suitable when the rivnut protrudes noticeably above the surface or when drilling is inconvenient. It is especially useful for thick base materials or rivnuts positioned shallowly.
Tool Selection:
- Commonly use an angle grinder with a metal cutting disc;
- Typical disc sizes are 115 mm or 125 mm diameter, thickness about 1.0–1.2 mm, made of aluminum oxide or silicon carbide;
- For hard stainless steel rivnuts, diamond-coated or titanium-coated discs are recommended for better wear resistance and cutting efficiency.
Cutting Speed and Operation Parameters:
The angle grinder’s no-load speed is usually 11,000–12,000 RPM;
Maintain steady and even pressure to avoid overheating or disc breakage;
Cutting time depends on rivnut material and thickness, usually 10–30 seconds to cut a standard M6–M10 rivnut.
Cutting Position:
- Cut along the rivnut flange edge to avoid damaging the base material hole wall;
- For flat-mounted rivnuts, cut around the contact edge of the flange and base;
- For chamfered or irregular surfaces, adjust cutting angle to avoid base material damage.
Removal Process:
After cutting, lightly tap the remaining rivnut portion with a hammer to knock it out;
Use a punch tool if necessary to assist removal and avoid jamming;
After removal, grind and smooth the hole edges for a clean surface to reinstall.
Safety Protection:
- Wear safety goggles, face shield, dust mask, and gloves during operation;
- Avoid metal sparks causing injury or fire;
- Work in a well-ventilated area to prevent inhalation of metal dust.
Practical Application Reference:
In machinery maintenance, using a 115 mm angle grinder with a cutting disc removed an M8 steel rivnut in about 20 seconds without damaging the base;
Cutting stainless steel sheets requires special carbide grinding wheels, increasing efficiency by about 30% and reducing heat deformation.
c. Punch-Out Method
Punching out is suitable when the rivnut’s tail is not fully crimped or the structure is loose, and there is access to the backside of the base material. This method uses impact force to push the rivnut directly out of the hole, minimizing damage to the base surface.
Applicable Conditions:
- Rivnut is loosely riveted without obvious or adequate tail flaring;
- Base material hole edges are intact and undamaged to withstand impact;
- There is sufficient space behind the hole to place a punch and perform hammering;
- Typically suitable for thin plates, aluminum sheets, and some composite materials.
Required Tools:
Punch: a cylindrical steel punch with a diameter slightly smaller than the hole;
Hammer or impact hammer: to apply impact force to the punch and drive out the rivnut;
Optional aids: backing blocks or guide sleeves to ensure punch alignment.
Operation Steps:
Ensure the backside is accessible and clean the hole area;
Choose a punch size that covers the rivnut hole fully but does not damage the base hole edges;
Insert the punch from the backside to contact the rivnut bottom;
Strike the punch evenly and forcefully with a hammer to push the rivnut out;
Remove the rivnut remnants and inspect the base hole integrity.
Operation Data and Notes:
Impact force required depends on rivnut size and material, e.g.:
M6 steel rivnut requires about 500–800 Nm impact energy (adjust according to equipment and hardness);
Stainless steel rivnuts require 20–30% more force due to higher hardness;
Keep the punch perpendicular to avoid deforming or enlarging the hole edges;
Operators must wear safety goggles and gloves to prevent injury from metal fragments;
If the rivnut does not come out after impact, use auxiliary methods like drilling.
Advantages and Limitations:
Advantages: fast, labor-saving, minimal damage to base material, good for on-site quick repairs;
Limitations: requires rear access and a loose rivnut structure, otherwise difficult to punch out.
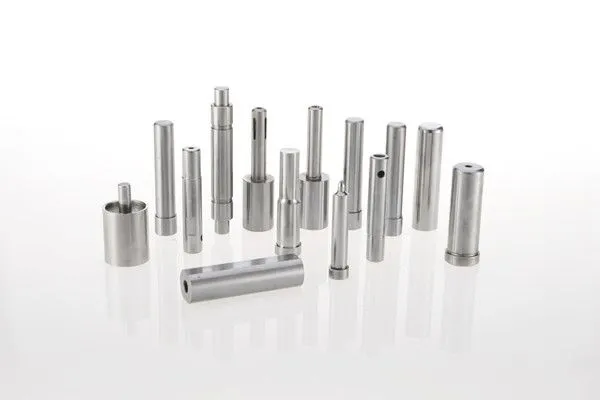
d. Specialized Removal Tools
With the increased use of rivnuts and demand for removal, some premium brands offer specialized tools designed specifically for rivnut removal. These tools aim to remove damaged or failed rivnuts quickly and safely without damaging the base material.
Tool Types:
Rivnut Removal Puller: screws a special bolt into the rivnut internal thread and uses pulling force to gradually extract the rivnut;
Nut Splitter: cuts and splits the rivnut for removal when it cannot be unscrewed or pulled out;
Specialized Cutting Tools: precise electric tools that cut along the rivnut flange edge, maximizing base material protection.
Working Principles:
Pullers lock into the rivnut’s internal threads and apply outward force to overcome the crimp grip and pull the rivnut out intact;
Splitters break the rivnut to reduce removal force and avoid base deformation;
Cutting tools ensure accurate depth and angle control to avoid damage.
Applicable Scenarios:
High-precision manufacturing and repair environments (aerospace, automotive, electronics assembly lines);
Thin or fragile base materials where traditional removal methods risk damage;
Maintenance of high-value structural parts where secondary processing or replacement is costly.
Performance Data:
- Nut splitter blades typically have hardness above HRC 55 for efficient and durable cutting;
Cutting tools can achieve ±0.1 mm precision to protect the base material.
Advantages and Limitations:
- Advantages: precise control, minimal base material damage, high removal efficiency, reusable tools;
- Limitations: higher cost, requires trained operators, some tools are model-specific with limited general applicability.
What Are the Key Precautions When Removing a Rivnut?
a. Pay Attention to the Structural Integrity of the Removal Area
If the Rivnut is installed in a structural or load-bearing component, its removal may cause damage to the hole, resulting in enlargement or deformation. This could affect the quality of future fastener installations and the structural strength. After removal, carefully check the hole size and wall condition, and use measuring tools if necessary to confirm whether the dimensions exceed tolerance limits.
b. Handling of Hole Damage
When the hole is damaged or enlarged, it may no longer be possible to reinstall the same size Rivnut. In such cases, consider:
Whether reinforcement (such as steel rings or thick washers) is needed to repair the hole;
Whether a larger size Rivnut should be used to ensure a secure fastening;
Whether the base material needs to be repaired or replaced to maintain the overall structural integrity.
c. Be Careful to Avoid Enlarging the Hole
During the removal process, especially when using mechanical impact or pulling methods, control the force and direction carefully to avoid further enlarging the hole or damaging the base material, which could affect future use and repairs.
d. Correct Tool Selection and Maintenance
Choosing the appropriate removal tools can not only improve the efficiency of removal but also reduce damage to the base material. Before use, ensure that the tools are in good condition, with sharp blades and intact pulling devices, to avoid removal failures or secondary damage due to tool issues.
How to Repair and Reinstall After Removing a Rivnut?

1. Clear Debris from the Hole and Check for Deformation
After removing the Rivnut, metal shavings or plastic fragments are often left inside the hole, which must be thoroughly cleaned to avoid affecting the subsequent installation and fastening performance. Also, carefully inspect the hole walls for cracks, deformation, or enlargement. If the hole walls are uneven or have defects, sanding or repair work should be done to ensure a smooth installation surface with the proper dimensions.
2. If the Hole is Enlarged, Consider Using a Larger Rivnut (e.g., M6 → M8)
During the removal process or due to prior damage, the hole may become larger than its original size. If the original Rivnut size is used again, the installation may not be secure. It is recommended to choose a larger size Rivnut to fit the enlarged hole, such as switching from M6 to M8. Ensure that the base material thickness and strength meet the requirements for the larger Rivnut.
3. If the Base Material is Severely Damaged, Consider Adding a Reinforcing Plate or Using a Back Washer
If the base material around the hole is damaged (e.g., deformation, cracks, loosening) due to removal or use, simply replacing the Rivnut may not provide a secure fastening. In such cases, it is recommended to add a metal reinforcing plate or use a specialized washer on the back side of the hole to increase the load-bearing area and structural strength, improving connection stability and durability.
4. Consider Using a Hexagonal Rivnut or Anti-Rotation Knurled Rivnut for Enhanced Locking Effect
To prevent the Rivnut from rotating or loosening again, you can choose a Rivnut with a design that offers better anti-rotation performance. Hexagonal Rivnuts are mechanically locked into place by fitting into a hexagonal hole; while anti-rotation knurled Rivnuts create a tight grip with the hole wall through surface knurling, increasing friction and locking effect. Choosing the appropriate anti-rotation Rivnut based on the application environment and base material characteristics can help improve installation quality and service life.
Conclusion
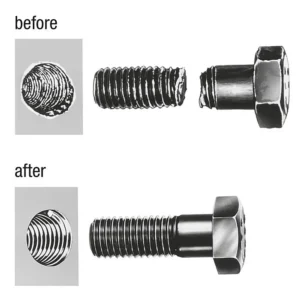
Consider Simpler Repair Solutions Before Deciding to Remove a Rivnut, Such as Replacing a Bolt
Before deciding to remove a damaged Rivnut, assess whether there are simpler solutions that can resolve the issue without removal. For example, if the thread is slightly damaged but still provides enough fastening force, consider replacing the internal threaded bolt or using a thread repair kit. This can avoid secondary damage to the base material and reduce the complexity of the repair process.
For Applications Requiring Frequent Replacement, Opt for Reusable Threaded Inserts
In environments where fasteners need to be frequently removed and replaced, traditional Rivnuts may lead to hole enlargement or thread damage due to repeated installation and removal. In such cases, it is recommended to use high-quality reusable threaded insert systems, which provide durable internal threads and can support multiple removals and installations, enhancing maintenance efficiency and extending the service life of the structure.
For Bulk Failures, Review Riveting Parameters, Hole Design, and Tool Configuration
If a particular batch or model of Rivnuts is frequently failing or malfunctioning, a systematic analysis should be conducted. This includes reviewing the riveting pull force settings, stroke length, hole diameter design, and the maintenance and calibration of riveting tools. Investigating these key parameters will help identify potential process defects or design flaws, preventing similar issues from occurring in the future and ensuring product quality and user safety.
Do You Have Any Questions?
Let Us Solve Your Problem
Buy Rivet Nuts from Rivetfix

As a leading fastener manufacturer in China with more than 15 years in the industry, Rivetfix are committed to providing first-class quality fasteners and responsive services to the world. We offers a wide range of rivet nuts and clinch nuts designed to meet the unique demands of your projects. Rivetfix ensures you have the right solution for every application. Choose Rivetfix for versatile, cost-effective, and durable fastening solutions tailored to your specific needs. In addition, we can also provide customized rivet nuts service and clinch nuts according to your requirements.
Contact us now for more information and customization options on Rivet Nuts!
Get High Quality Rivet Nuts Quote!

Send Your Rivet Nut Request
For more than 20 years, Rivetfix has helped customers solve many rivet nuts sourcing needs and technical challenges.
Have a question? Contact us and we’ll provide you with the perfect solution.