How to Install Rivet Nuts Without Tool?
Leading Rivet Nut Manufacturer and Supplier in China

In modern manufacturing and DIY projects, rivet nuts are widely used fasteners that provide strong threaded connections in thin or soft materials such as sheet metal. Typically, installing rivet nuts requires specialized tools like rivet nut guns or hand riveters to ensure secure and precise installation. However, in many real-world situations—such as home DIY tasks, remote repairs, prototyping, or budget-limited projects—users may not have access to these professional tools. This is where the question “how to install rivet nuts without tool” becomes highly relevant for many people.
This blog aims to introduce several practical methods for installing rivet nuts without the need for specialized tools, offering reliable alternatives for situations where resources are limited or quick solutions are needed.
Table of Contents
When Would You Need to Install Rivet Nuts Without a Tool?
1. For DIY Projects or Temporary Repairs
In small-scale DIY tasks or minor repair jobs—such as building a wooden storage box, fixing metal panels, adding a hook, or modifying a PC case—you may only need to install one or two rivet nuts. These applications usually don’t require high structural strength, and the frequency of use is low. Purchasing a professional rivet nut tool may not be cost-effective. In such cases, a simple, tool-free installation method using everyday items can be a practical alternative.
2. In Remote Locations or Emergency Situations Without Tools
When working outdoors, in remote areas, or during urgent repairs—such as field maintenance of power enclosures, temporary structural fixes, or construction work in rural regions—it’s not always possible to bring or access professional tools. If you can install rivet nuts using common items like bolts, washers, and wrenches, you can save time, avoid project delays, and complete the task effectively even in tough conditions.
3. For Sample Assembly or Small-Batch Prototyping
During the early stages of product development or prototyping—like assembling sheet metal parts, testing industrial housings, or validating structural designs—you might need to install only a few rivet nuts. Since the volume is low and timelines are tight, buying dedicated tools is often unnecessary. Using a manual or tool-free method helps reduce costs, speed up testing cycles, and support fast design iterations.
4. For Educational Demonstrations or Skills Training
In technical schools, training centers, or engineering workshops, instructors may need to demonstrate how rivet nuts work. For safety and budget reasons, it’s not always practical to equip every student with a tool. Teaching the manual installation method allows learners to grasp the structure and function of rivet nuts more clearly and makes repeated hands-on practice accessible.
Alternative Methods to Install Rivet Nuts Without Special Tools
Method 1: Bolt + Washer + Nut Technique (Recommended)
Required Materials:
A bolt that matches the rivet nut’s internal thread
A nut
1–2 washers (preferably metal)
A wrench or adjustable spanner
Step-by-Step Instructions:
Prepare the Workpiece: Drill a hole in the material that matches the outer diameter of the rivet nut. Ensure the hole is clean and free of burrs.
Insert the Rivet Nut: Place the rivet nut into the hole so that the flange sits flush against the surface.
Assemble the Tool: Thread the bolt through the washer and nut, and screw it into the rivet nut. The nut and washer should rest outside the flange on the material surface.
Tighten the Nut: Hold the bolt head in place with a wrench, and tighten the nut. This action pulls the rivet nut upwards, causing its backside to expand and clinch the material.
Remove the Bolt: Once the rivet nut is securely set, unscrew and remove the nut and bolt. Installation is complete.
Applicable Materials & Precautions:
Suitable for metal sheets, plastic panels, and hardwood.
Ensure proper alignment to avoid tilting the rivet nut.
Do not overtighten, as this may damage the rivet nut or deform the workpiece.
Method 2: Bench Vise or C-Clamp Compression (Optional Alternative)
Required Materials:
A bench vise, C-clamp, or manual press
Flat washers (optional, to increase contact area)
Step-by-Step Instructions:
Insert the Rivet Nut: Place the rivet nut into the pre-drilled hole with the flange resting on the surface.
Clamp in Place: Using a C-clamp or bench vise, slowly compress the rivet nut until the rear end flares and grips the back side of the material.
Check the Fit: Observe the clamping progress and use washers if necessary to protect surfaces or evenly distribute force.
Precautions:
Best suited for softer materials like aluminum, plastic, or thin sheet metal.
Be careful with pressure to avoid cracking the material or deforming the threads.
Not ideal for high-torque or structural applications.
Method 3: Hammer + Support Base Method (Not Recommended, Emergency Use Only)
Required Materials:
A bolt that fits the rivet nut
A hammer or rubber mallet
Washers and a solid support base (e.g., metal anvil or block)
Step-by-Step Instructions:
Insert the Rivet Nut: Place the rivet nut into the hole as usual.
Screw in the Bolt: Insert and lightly tighten a bolt into the rivet nut. Place a washer on top to spread impact force.
Hammer Carefully: With a solid backing underneath the workpiece, gently tap the bolt head to drive the rivet nut inward. The compression against the backing will cause the rear of the nut to flare and grip the material.
Risks & Limitations:
This method offers poor control and may cause misalignment or thread damage.
Not suitable for precise or load-bearing applications.
Only to be used as a last resort in urgent or remote conditions.
Comparison Table of Methods
| Method | Tools/Materials Needed | Best For | Pros | Cons |
| Bolt + Washer + Nut | Bolt, nut, washer, wrench/spanner | Most DIY users and light-duty tasks | – Most reliable DIY method- Low risk of thread damage- Good control | – Requires precise alignment- Takes time for multiple installations |
| Bench Vise / C-Clamp Compression | Bench vise or C-clamp, optional washers | Soft or thin materials like plastic/aluminum | – No threading required- Easy to control compression | – May damage fragile materials- Not suitable for heavy-duty use |
| Hammer + Support Base | Hammer, bolt, washer, solid backing surface | Emergency use only | – Quick and requires minimal tools | – High risk of misalignment- Can damage threads or workpiece |
How to Stop a Rivet Nut from Spinning?

When a rivet nut begins to spin during or after installation, it indicates that the nut is not securely anchored in the base material. This is a common issue, especially when dealing with soft materials, oversized holes, or improper installation techniques. Below are the common causes and effective solutions.
1. Common Causes of Rivet Nut Spinning:
Oversized or Irregular Hole:
If the pre-drilled hole is too large or uneven, it won’t create the necessary interference fit for the rivet nut to grip properly.Incomplete Expansion of the Rivet Nut:
If the nut is not fully compressed during installation, the back flange may not hold tightly against the material.Soft or Thin Base Material:
Materials like plastic or thin aluminum may not provide enough resistance to the expanding force of the rivet nut.Improper Installation Technique:
Using makeshift methods or incorrect tool operation can result in partial installation and weak anchoring.
2. Effective Solutions to Prevent Spinning:
Use the Correct Hole Size:
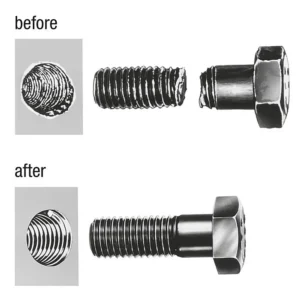
Always follow the manufacturer’s recommended drill size (e.g., an M6 rivet nut typically requires a 9.0 mm hole) to ensure a tight interference fit.Choose Knurled or Hex/Part-Hex Body Rivet Nuts:
These designs have textured or angular surfaces that grip the base material better than smooth, round bodies.Select Appropriate Material and Wall Thickness:
Use large flange rivet nuts or reinforcement washers for soft or thin materials to increase surface grip.Use Proper Installation Tools:
A professional rivet nut tool (manual or pneumatic) ensures full expansion and proper compression of the nut body.Apply Adhesive or Thread Locker (Optional):
For added friction, you can apply a small amount of structural adhesive or thread locker to the hole or outer surface of the nut before installation.Use Closed-End Rivet Nuts:
These types help improve strength and support from the bottom, especially in load-bearing applications.
3. Emergency Fix Suggestions:
If a rivet nut is already spinning:
Remove and replace it with a larger-size rivet nut.
Add adhesive to the hole and reinstall.
Use a hex-shaped hole with a hex-body rivet nut for anti-rotation locking.
What Should You Pay Attention to When Installing Rivet Nuts?
a. Ensure the Base Material Thickness Matches the Rivet Nut Specifications
Each type of rivet nut is designed for a specific material thickness range. If the base material is too thin, the rivet nut may not grip securely; if it’s too thick, the nut might not set properly or could fail during installation. Always check the manufacturer’s technical datasheet before selection.
b. Drill the Correct Hole Size
An oversized hole may cause the rivet nut to spin or fall out after installation, while an undersized hole can damage the nut during insertion. Use the recommended drill bit size and verify with a gauge if necessary.
c. Apply Proper Installation Force
Whether using a professional tool or a DIY method, apply just enough force to allow the rivet nut to expand and grip the base material tightly. Avoid over-tightening, which can deform the nut or damage the material.
d. Ensure the Mounting Surface Is Clean and Burr-Free
The hole edges should be smooth and free of burrs to allow the rivet nut to seat flush against the surface. Rough or uneven surfaces may affect the fit and holding strength.
e. Use Professional Tools If Available
While this article covers alternative methods without tools, using professional rivet nut tools is still recommended for better long-term performance. Proper installation equipment ensures maximum clamping strength and reduces the risk of spinning or loosening over time.
FAQs
1. What materials or tools do I need for manual installation?
To install a rivet nut manually, you typically need:
A bolt that matches the rivet nut thread size
A washer to distribute pressure
A nut to tighten against the washer
A wrench or spanner to provide torque
Optionally, a second wrench can help hold the rivet nut in place if needed. This method compresses the rivet nut body from the inside, causing it to expand and grip the base material.
2. What types of rivet nuts work best for tool-less installation?
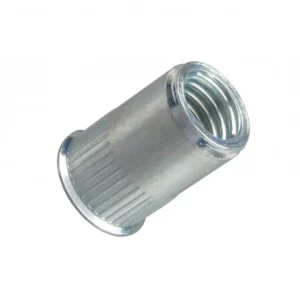
Knurled body rivet nuts or large flange rivet nuts are more suitable for tool-less installation because:
Knurled surfaces provide better grip and prevent spinning.
Large flanges distribute load more evenly and offer stronger anchoring on soft materials.
Avoid using round-body rivet nuts without surface grip features, as they are more likely to spin or install unevenly when using DIY methods.
3. On what materials can I install rivet nuts without tools?
Manual installation works best on relatively thin sheet metal, plastic, or soft materials where a strong interference fit can be achieved. Avoid very hard or thick materials unless you have access to proper tools, as achieving adequate compression force becomes difficult and may damage both the rivet nut and base material.
4. Are tool-less methods secure and long-lasting?
Tool-less installations can be secure if:
The hole size is correct.
Proper technique is followed.
The rivet nut is fully compressed during installation.
However, for load-bearing, high-vibration, or safety-critical applications, it’s always recommended to use professional rivet nut tools. DIY methods are better suited for light-duty use, prototyping, or emergency repairs.
5. How do I make sure the rivet nut doesn’t spin during installation?
To prevent the rivet nut from spinning:
Ensure the hole is the correct size — neither too tight nor too loose.
Use a knurled body rivet nut, which has ridges that grip the material.
Hold the rivet nut in place using a wrench, locking pliers, or friction from the material itself.
If it still spins, consider lightly roughening the surface around the hole to increase grip.
6. Can I reuse a rivet nut installed without a tool?
Rivet nuts are generally not designed to be reused, especially after being deformed to grip the material. Removing them often damages the body or threads. If you must remove one, consider replacing it with a new one. For removable fasteners, threaded inserts or press-fit nuts may be better options.
7. How strong is a rivet nut installed without a tool?
The strength depends on:
The material and size of the rivet nut,
The precision of the installation,
The tightness of the compression.
While DIY methods can achieve decent clamping force, they may not match the reliability or repeatability of professional installation tools. Use caution if applying load-bearing functions.
8. Can I use power tools (like drills or impact drivers) for installation?
It’s possible but not recommended for beginners. Using drills or impact drivers can:
Apply uneven torque,
Strip threads or deform the rivet nut,
Damage surrounding material.
If you attempt this method, proceed slowly and carefully monitor the compression process.
Do You Have Any Questions?
Let Us Solve Your Problem
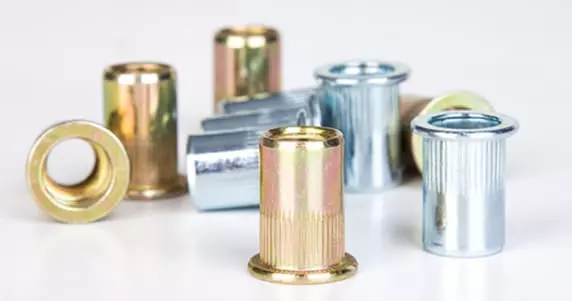
Buy Rivet Nuts from Rivetfix
As a leading fastener manufacturer in China with more than 15 years in the industry, Rivetfix are committed to providing first-class quality fasteners and responsive services to the world. We offers a wide range of rivet nuts and clinch nuts designed to meet the unique demands of your projects. Rivetfix ensures you have the right solution for every application. Choose Rivetfix for versatile, cost-effective, and durable fastening solutions tailored to your specific needs. In addition, we can also provide customized rivet nuts service and clinch nuts according to your requirements.
Contact us now for more information and customization options on Rivet Nuts!
Get High Quality Rivet Nuts Quote!

Send Your Rivet Nut Request
For more than 20 years, Rivetfix has helped customers solve many rivet nuts sourcing needs and technical challenges.
Have a question? Contact us and we’ll provide you with the perfect solution.