How to Install Rivet Nuts?11 Steps to Install Rivet Nuts
Leading Rivet Nut Manufacturer and Supplier in China
Installing rivet nuts is a straightforward process that provides a strong, durable threaded insert in materials like metal, plastic, or composites. Whether you’re using manual, electric, or pneumatic tools, the installation involves a series of precise steps. In this guide, we will show you how to install rivet nuts. Ensure the efficiency and quality of the fastening process by guiding you through the 11 basic steps to effectively install rivet nuts.
Table of Contents
The Importance of Properly Installing Rivet Nuts
The proper installation of rivet nuts is crucial to ensuring the strength, safety, and longevity of a fastening connection. When installed correctly, rivet nuts provide a secure and reliable threaded anchor point that can withstand significant tensile and shear forces. However, improper installation can lead to weak connections, potential failure under load. They may result in damage to the materials being fastened.
Let’s discuss in details the importance of installing the rivet nut correctly, before we understand how to install rivet nuts.
1. Maximizing Load-Bearing Capacity
Correctly installed rivet nuts ensure optimal tensile strength and shear resistance. A poor installation can result in the rivet nut not fully expanding or seating in the material, reducing its ability to bear the intended load. This can cause the fastener to fail under stress, leading to structural or operational problems.
2. Preventing Material Damage
Proper installation helps prevent damage to the base material (such as thin metals, plastics, or composites). Over-tightening, incorrect tool settings, or misalignment during installation can cause the material to deform, crack, or even break, compromising the integrity of the entire assembly.
3. Ensuring Tight and Reliable Connections
Rivet nuts are designed to create a secure threaded connection. If installed incorrectly, the fastener may not achieve a firm grip, leading to loosening over time due to vibrations or mechanical stress. This can result in parts becoming loose or even falling off, causing operational downtime or safety hazards.
4. Avoiding Expensive Rework
An improperly installed rivet nut may need to be replaced or corrected, leading to increased labor and material costs. This rework can be time-consuming and costly, especially in high-volume production settings or when working with specialized components.
5. Enhancing Durability and Longevity
Correct installation contributes to the durability of the fastening system. Properly installed rivet nuts resist corrosion, wear, and environmental stress more effectively, ensuring that the assembly remains strong and functional over the long term.
How to Install Rivet Nuts: 11 Steps
Understanding how to install rivet nuts properly is key to ensuring long-lasting, reliable performance in your projects. his guide will walk you through the 11 key steps to install rivet nuts efficiently. From choosing the right type of rivet nut to performing final quality checks for a perfect fit.
1. Preparation Before Installing Rivet Nuts
Check Tools and Materials: Ensure all necessary tools (such as pneumatic rivet nut gun, rivet nuts, tool heads, air supply, etc.) are prepared and in good working condition. Confirm that the material, size, and quantity of the rivet nuts meet project requirements.
2. Choose the Right Rivet Nut for the Application
Choosing the right rivet nut is an important prerequisite for deciding how to install rivet nuts. It directly impacts the performance and strength of the final connection. The correct rivet nut ensures compatibility with the material being fastened, the required load capacity, and the type of tool used for installation.
Material Selection:

| Types of Rivrt Nts | Application | Characteristics |
| Steel Rivet Nuts | Suitable for high-load, high-strength applications such as machinery, construction, and automotive parts. | Offers high strength, wear resistance, and hardness but may be prone to corrosion. Requires corrosion protection like galvanizing or hot-dip galvanizing. |
| Stainless Steel Rivet Nuts | Suitable for corrosive environments like chemical equipment, marine applications, food processing, etc. | High corrosion resistance, ideal for harsh environments. Also, has high strength for demanding conditions. |
| Aluminum Rivet Nuts | Suitable for lightweight structures like aerospace, automotive lightweighting, and electronics. | Lightweight, corrosion-resistant, but lower strength than steel and stainless steel. Suitable for medium-low load applications. |
| Copper Rivet Nuts | Suitable for applications requiring high electrical conductivity, such as electrical equipment and electronic products. | Good electrical conductivity, but lower strength. Typically used for electrical connections. |
Size Selection:
Outer Diameter:
The outer diameter should be slightly larger than the installation hole diameter to ensure the rivet nut is securely fixed.
Recommended Gap: Outer diameter is typically 0.2mm to 0.5mm larger than hole diameter.Internal Thread Size:
The internal thread diameter should match the diameter of the bolt or screw used.
Common Specifications: M6, M8, M10, etc., for metric threads or 1/4″, 5/16″, etc., for imperial threads.
3. Choose the Correct Tool Head
Ensure the selected rivet nut tool head matches the specifications (including threads and outer diameter) of the rivet nuts. The type of tool head determines the expansion method and effect of the rivet nut.
The shape of the tool head is crucial for the installation of the rivet nut. Common tool head shapes include round, flat, and deep-drawn heads, each suited for different types of rivet nuts and installation environments.
- Round tool heads are typically used for standard rivet nuts, providing even pressure distribution.
- Flat tool heads are suitable for shallow or low-profile rivet nuts, allowing precise installation in tight spaces.
- Deep-drawn tool heads are ideal for deeper rivet nuts, ensuring stability and a secure expansion process.
Choosing the correct tool head shape optimizes the installation process and ensures strong, durable connections.
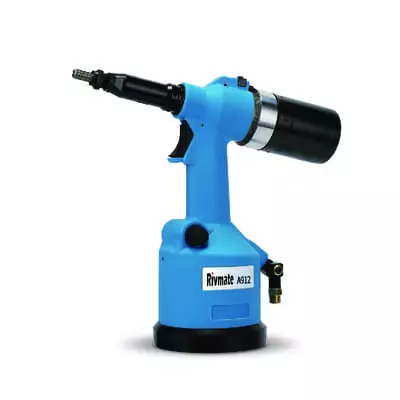
4. Set the Pneumatic Rivet Nut Gun Pressure
Adjusting Air Pressure:
Adjust the pneumatic rivet nut gun pressure according to the specifications and installation requirements of the rivet nut.
Typically, the pressure range for pneumatic rivet nut guns is 4-7 bar (about 60-100 psi). Lower pressure is suitable for softer materials (such as plastics or aluminum alloys) to prevent excessive expansion force from damaging the material; higher pressure is suitable for harder materials (such as steel or stainless steel) to ensure proper expansion and secure fixation.
For optimal results, it is recommended to select the appropriate air pressure based on the specific application and adjust the pressure through testing to achieve the desired installation effect.
Testing Air Pressure:
First, ensure that the rivet nut gun is correctly connected to the compressed air system and that the air supply is stable. Then, gradually adjust the pressure, typically starting from a lower air pressure (e.g., 4 bar) and increasing to the recommended range (usually 4-7 bar).
After each adjustment, perform a test installation and observe if the rivet nut expands as required. If the rivet nut does not fix correctly or the material deforms, further pressure adjustments may be needed.
5. Prepare the Installation Hole
Hole Size Check: Ensure the hole diameter matches the outer diameter of the selected rivet nut. Typically, the rivet nut’s outer diameter is slightly larger than the hole diameter to ensure proper expansion and secure fastening. A hole that is too large or too small will lead to a weak installation or prevent the rivet nut from expanding properly. Precise measurement and control ensure the stability and longevity of the rivet nut.
Recommended installation hole ranges for different types of rivet nuts
- Standard Rivet Nuts: For example, an M6 rivet nut typically requires a hole diameter of 6.5mm to 7.0mm to ensure a secure and strong connection.
- Countersunk Rivet Nuts: For countersunk rivet nuts, the hole diameter generally needs to be 0.2mm-0.5mm larger than the standard type to accommodate the wider countersunk portion. For instance, an M6 countersunk rivet nut may require a hole diameter of 7.0mm to 7.5mm.
- Jack Nuts: For soft materials such as plastics and composites, the hole diameter is typically larger to reduce installation pressure. For example, an M8 Jack nut may require a hole diameter of 8.5mm to 9.0mm.
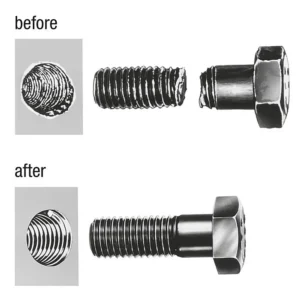
6. Insert the Rivet Nut
- Align the Rivet Nut: Align the external threaded part of the rivet nut with the installation hole and carefully insert it. Ensure the rivet nut is properly aligned, with the threads facing the surface to be connected.
- Check the Insertion Position: When inserting the rivet nut, ensure that it is fully inside the hole and that the outer edge of the rivet nut is flush with the surface of the base material. The rivet nut should not protrude to avoid affecting subsequent operations or causing aesthetic issues. Also, check that the rivet nut is inserted evenly and not tilted or offset, ensuring a secure and correct installation.
7. Align the Rivet Nut Gun

- Align the Tool Head: When using the rivet nut gun, ensure that the tool head is properly aligned with the rivet nut. Align the tool head precisely with the outer edge of the rivet nut, ensuring the tool head and rivet nut’s centerline are parallel.
- Secure the Hold: Before applying pressure, ensure the rivet nut is fully inserted into the hole to avoid misalignment during the process. Hold the tool handle securely to maintain stability and apply even pressure.
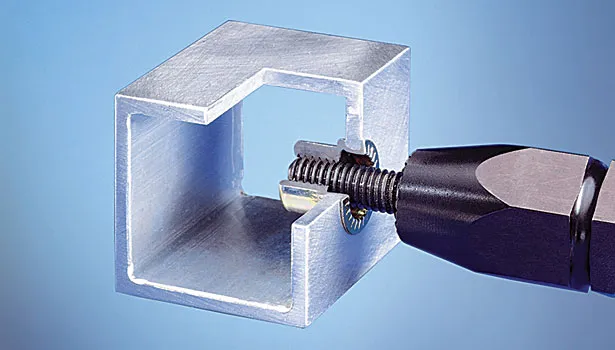
8. Start the Pneumatic Rivet Nut Gun
- Start and Apply Pressure: Gently start the pneumatic rivet nut gun and apply consistent pressure. As the tool head moves forward, it will apply pneumatic pressure to expand the rivet nut, creating a stable connection. Maintain steady pressure and a smooth motion to ensure the installation is uniform and secure.
- Observe the Rivet Nut Expansion: Throughout the process, observe the expansion of the rivet nut. When installed correctly, the bottom of the rivet nut will make full contact with the material surface, and the expanding internal wings or outer ring will securely hold the material.
9. Complete the Riveting
- Automatic Stop: Once the riveting process is complete, the tool head will automatically stop. At this point, the rivet nut will be firmly fixed to the material.
- Check the Rivet Nut’s Stability: Test the rivet nut’s stability gently with your hand or a tool. You can perform a pull test or thread insertion test to check its firmness. Ensure the rivet nut is not loose.
10. Remove the Tool
- Disconnect the Air Supply: First, close the air supply valve of the pneumatic rivet nut gun to stop the tool from working. Disconnecting the air supply prevents accidental triggering or air leaks.
- Disassemble the Rivet Nut Gun: Depending on the tool design, carefully remove the head of the rivet nut gun, avoiding excessive force that may cause damage. During disassembly, ensure that the tool parts, especially the piston and compression components, are not damaged.
- Clean and Store the Tool: Use a cleaning cloth or air blower to clean the rivet nut gun, especially the tool head and air inlet. Place the rivet nut gun in a dry, dust-free area and ensure the tool is in good condition. Regularly check the air hose of the pneumatic tool to prevent aging or leaks from prolonged disuse.
11. Check Installation Quality
- Rivet Nut Firmness Check: After riveting, manually check if the rivet nut is securely fixed to the material. Gently shake the rivet nut to ensure it does not loosen or rotate. If the rivet nut is not firmly fixed, reinstallation may be necessary.
- Appearance Check: Inspect the appearance of the rivet nut to ensure that its expanded section is even and there are no signs of over-expansion or cracking. The expanded area should be flat and in close contact with the material surface, with no material deformation or cracking.
- Rivet Nut Strength Testing: Depending on the project requirements, perform appropriate load testing. Apply slight pulling or shear forces to test the stability of the rivet nut. If the rivet nut can withstand the designed load without loosening or breaking, the installation is successful.
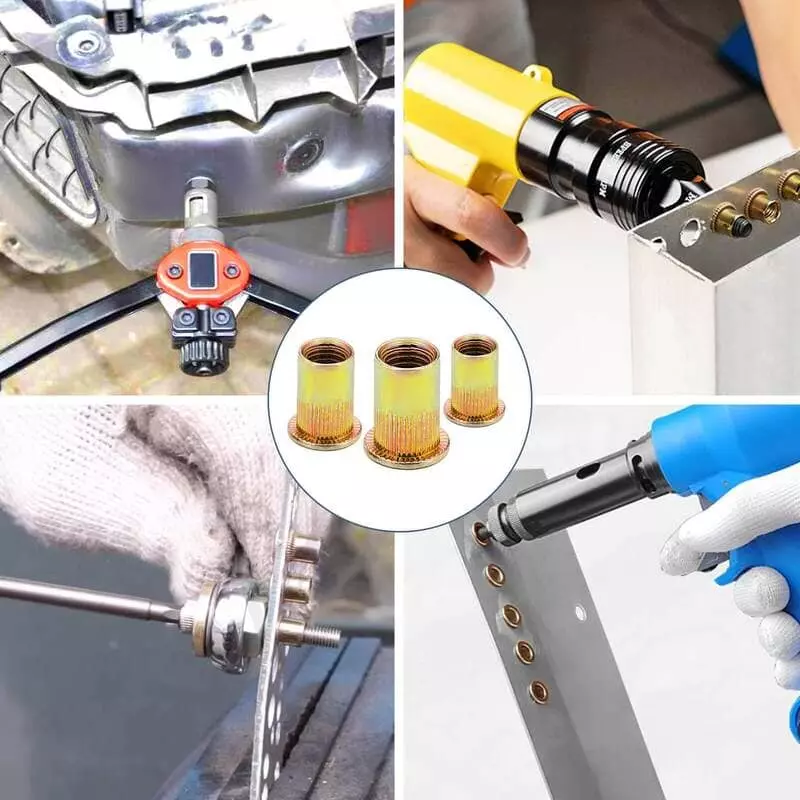
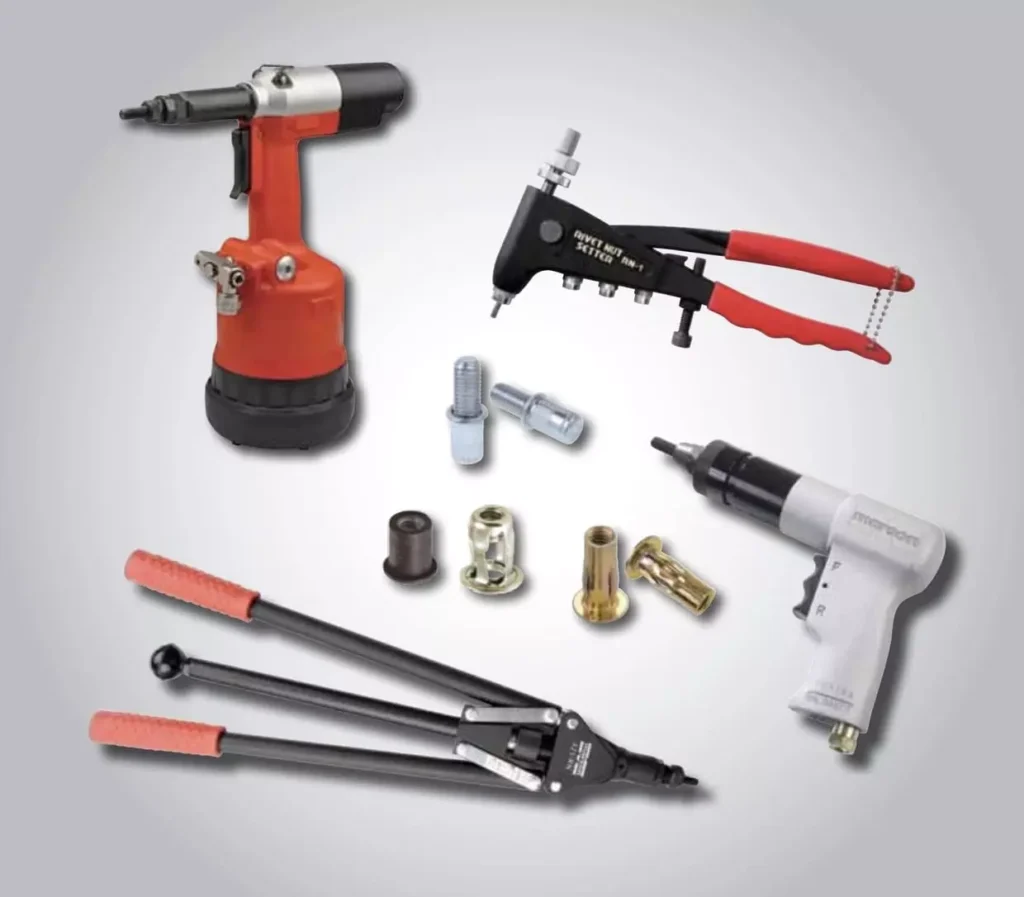
Rivet nut installation tools can be broadly categorized into manual, electric, and pneumatic types, each suitable for different needs:
| Tool Type | Description | Advantages | Disadvantages |
| Hand Tools | Hand-operated tools for smaller, low-volume installations. | Simple to use and affordable, No power source required. | Labor-intensive, Slow for large volumes, Limited force capacity. |
| Electric Tools | Powered by electricity, designed for moderate-volume use with more efficiency. | Faster than manual tools, More consistent force application. | Requires power source, More expensive than manual tools. |
| Pneumatic Tools | Air-powered tools for high-volume or heavy-duty applications. | Very fast and efficient, Ideal for high-volume production, Consistent performance. | Requires compressed air source, Higher initial cost, Maintenance needs. |
Common Problems and Solutions for Installing Rivet Nuts
- Rivet Nut Not Expanding Properly
Solution: This can happen if the installation tool is not set to the correct pressure or if the tool head does not match the rivet nut size. Ensure the installation tool is calibrated to the right pressure and the tool head is compatible with the rivet nut’s size and type. - Rivet Nut Loosening After Installation
Solution: This often occurs if the rivet nut is not installed with sufficient pressure or the material is too soft. To prevent loosening, increase the pressure slightly or switch to a higher-strength rivet nut suited for the material. - Material Damage
Solution: Excessive force during installation can damage the surrounding material, especially soft or thin materials like plastics. Adjust the installation pressure based on material type, and consider using a softer tool or a different type of rivet nut designed for delicate materials.
Do You Have Any Questions?
Let Us Solve Your Problem

As a leading fastener manufacturer in China with more than 15 years in the industry, Rivetfix are committed to providing first-class quality fasteners and responsive services to the world.
Whether you’re in automotive, construction, or electronics, Rivetfix ensures secure threaded connections, ideal for various materials and applications. We can select the most suitable fasteners according to your project needs, and provide product customization services. Explore high-quality products that deliver strength and reliability, elevating your assembly and fastening needs.
Contact us for project advice and the latest rivet nut quote!
Get High Quality Rivet Nuts Quote!

Send Your Rivet Nut Request
For more than 20 years, Rivetfix has helped customers solve many rivet nuts sourcing needs and technical challenges.
Have a question? Contact us and we’ll provide you with the perfect solution.