How Does a Rivet Nut Gun Work?
Leading Rivet Nut Manufacturer and Supplier in China
When working with thin materials like sheet metal or aluminum profiles, creating strong, reusable threads can be challenging. This is where rivet nuts—and the tools that install them—come into play. A common question from engineers and DIY users alike is: how does a rivet nut work, and how does a rivet nut gun make installation possible from just one side of the workpiece? In this section, we’ll explore the working principle of rivet nut guns, how they deform the rivet nut to create a secure threaded anchor, and why they’re essential in blind fastening applications.
Table of Contents
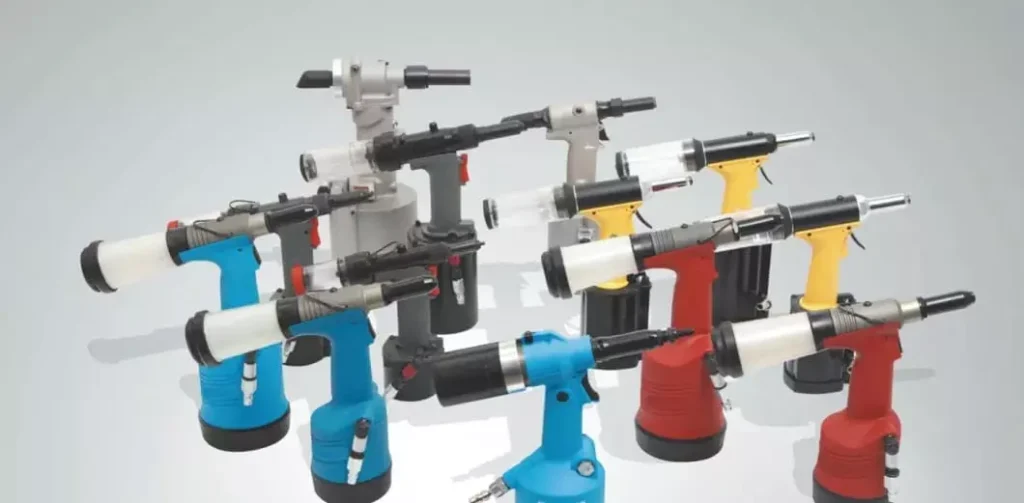
What Are Rivet Nut Guns?
A rivet nut gun is a specialized tool used to install rivet nuts by mechanically, pneumatically, or electrically fastening them onto thin sheets or profiles, creating a stable threaded connection point. It is widely applied in various industrial scenarios where blind hole installation or one-sided operation is required.
- The rivet nut gun serves as a crucial bridge between the rivet nut and the workpiece. It applies controlled force on the rivet nut from the front side to securely crimp the rivet nut onto the material surface without any backside support.
It is mainly used to achieve internal threaded fastening in metal sheets, aluminum profiles, plastic parts, and other thin-walled substrates, broadly replacing traditional welding nuts or threading processes.
It is especially suitable for working in blind holes, enclosed structures, or environments where the backside is inaccessible.
a. How Does a Rivet Nut Gun Work?
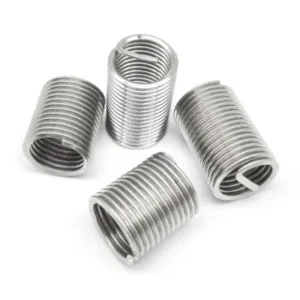
The tail section of the rivet nut is made of ductile material that flanges outward (expands) under a specific tensile force to form a “locking zone.”
The rivet nut gun connects to the threaded part of the rivet nut via a mandrel (spindle), and when activated, generates an axial pulling force.
Under this pulling force, the rivet nut’s tail is pulled backward, causing it to flare or deform, thus securely gripping the workpiece hole.
After the riveting action is complete, the tool automatically or manually retracts the mandrel, leaving behind a firm internal threaded connection point.
The entire process is performed from one side of the material only, requiring no backside access, making it a typical “blind assembly” tool.
b. What Are Rivet Nut Guns Used For?
1. Thin Sheet Connections (Especially Sheet Metal Structures)
For thin materials where tapping threads or using standard nuts is impossible, such as steel sheets, aluminum plates, and stainless steel sheets between 1–5 mm thick.
Using a rivet nut gun to install rivet nuts quickly establishes a strong, standardized internal thread connection in thin materials.
2. Enclosed Structures or One-Sided Operation Areas
Suitable for scenarios where backside access is not possible (e.g., inside tubes, enclosed profiles, internal compartments).
Rivet nut guns enable high-strength threaded connections operated from one side only, without any backside support.
3. Industrial Assembly and Production Lines
In large-scale standardized production in automotive manufacturing, home appliances, machinery, and other industries, rivet nut guns can quickly and efficiently complete installation tasks.
Using electric or pneumatic models greatly enhances assembly efficiency and consistency.
4. Maintenance and Modification Projects
Widely used to add new threaded connection points to existing structures during equipment maintenance, structural reinforcement, or vehicle modification.
Allows reliable fastening without damaging the original structure.
5. High-Strength Fastening Requirements
Compared with self-tapping screws or bolt+nuts, rivet nuts provide higher tensile and torque resistance.
Ideal for applications requiring vibration resistance and repeated disassembly, such as instrument panels, transportation equipment, and bracket installation.
c. What Are the Advantages of Using a Rivet Nut Gun?
| Advantage | Description |
|---|---|
| One-sided Installation | Suitable for blind holes and enclosed structures where backside is inaccessible |
| Fast and Efficient | Completes one riveting in seconds, ideal for assembly lines |
| Secure Connection | Creates permanent threaded joints with strong tensile and torque resistance |
| Easy Operation | Lightweight, easy to use, low training cost for operators |
| Wide Material Compatibility | Can be used with metals, plastics, composite panels, and more |
| Replaces Traditional Processes | Substitutes tapping and welding nuts, reducing labor and equipment costs |
What Are the Types of Rivet Nut Guns?
A hand rivet nut tool uses manual leverage through handles to drive the mandrel, stretching the tail of the rivet nut and causing plastic deformation to securely fasten the rivet nut to the workpiece.
Structural Features:
Typically consists of two handles, a screw assembly, a support frame, and interchangeable heads.
The rivet nut is first screwed onto the mandrel, then manually pulled to complete the riveting process.
Some models come with adjustable heads to accommodate different nut sizes (e.g., M4 to M8).

Advantages:
No power or air source required: Highly flexible and suitable for outdoor or power-limited environments.
Low cost: Generally priced from tens to hundreds of RMB, ideal for budget-conscious users.
Strong adaptability: Can be used on metal plates, plastic sheets, thin tubes, and more.
Ideal for maintenance and small-batch applications: Such as equipment repair, DIY assembly, and prototyping.
Disadvantages:
Requires significant manual force, leading to operator fatigue.
Not suitable for large-sized nuts (e.g., M10 and above) or hard materials.
Lower efficiency and consistency, not ideal for high-precision or high-volume production.
Typical Applications:
Repair and maintenance of small machinery.
Local reinforcement of sheet metal parts.
Home DIY projects.
Sample or small-batch production in factories.
An electric rivet nut gun automates the riveting process by using a motor to rotate and retract the mandrel, completing the nut pulling, deformation, and release with the push of a button—greatly improving efficiency and user comfort.
Structural Features:

Equipped with a motor, gear transmission, control board, and screw assembly.
Typically integrated into a compact body with ergonomic design for easy handling.
Supports multiple interchangeable heads (e.g., M4 to M10), with some high-end models offering torque adjustment.
Advantages:
Labor-saving: Riveting is completed by simply pressing a button without manual squeezing.
Higher efficiency: Suitable for medium to small batch production with fast speed and consistent quality.
Easy to learn: Reduces human errors, suitable for beginners.
Wide applicability: Compatible with common substrates like aluminum, stainless steel, and plastic.
Some models feature automatic reverse and nut ejection for even better productivity.
Disadvantages:
Requires power supply: Some models are corded, limiting mobility.
Higher cost: Prices range from several hundred to over a thousand RMB.
Limited power: Typically not suitable for larger nuts (usually ≤ M8) or high-strength conditions.
Motor overheating may occur during extended use.
Typical Applications:
Home DIY and workshop assembly.
Product assembly lines in small to medium enterprises.
Lightweight structural assembly like electrical enclosures, display racks, and metal cabinets.
Batch fastening of electrical cabinets, communication equipment, and similar products.
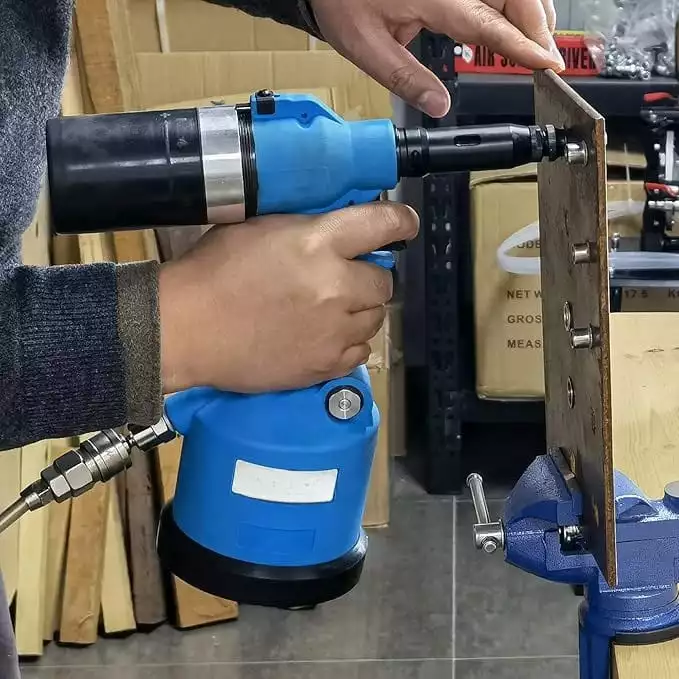
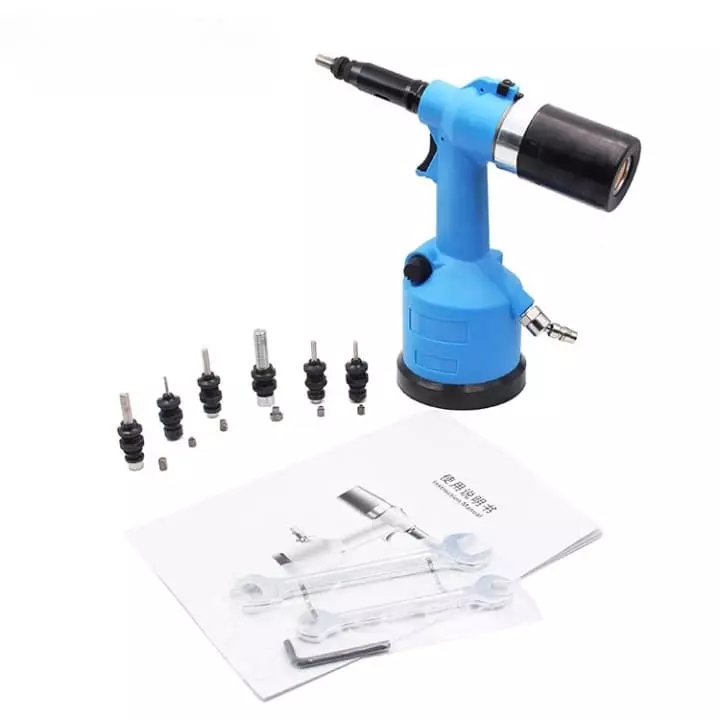
A pneumatic rivet nut gun uses compressed air to drive an internal piston generating pulling force, causing the rivet nut tail to deform and firmly clamp onto the base material. It is an industrial-grade tool suitable for high-intensity, continuous, and large-scale production.
Structural Features:
Connected to an air compressor via air hoses.
Contains cylinders, piston assemblies, directional valves, and screw driving mechanisms.
Equipped with quick couplings compatible with standard industrial air pressure (typically 6–8 bar).
Many models include automatic nut feeding and quick ejection features to boost assembly speed.
Advantages:
High efficiency: Pneumatic drive responds quickly; one rivet nut installation takes only 1–2 seconds.
Suitable for continuous operation: Virtually no operator fatigue, supports all-day assembly.
Strong pulling force: Can handle M3 to M10 carbon steel and stainless steel rivet nuts.
High riveting consistency: Constant torque and stable deformation ensure reliable mass production quality.
Low maintenance costs: Mature design with easy part replacement and upkeep.
Disadvantages:
Depends on compressed air: Must be used with an air compressor, reducing portability.
High initial investment: Requires air pumps, regulators, and related equipment besides the tool itself.
Noisy operation: Pneumatic impact noise needs to be considered for the work environment.
Heavier equipment: Some industrial models are bulky, requiring skilled operators.
Typical Applications:
Automotive parts assembly (e.g., bumpers, interior trims).
Sheet metal workshops (e.g., distribution boxes, ventilation ducts).
Assembly lines for metal furniture, lighting, display stands.
High-frequency usage scenarios like OEM/ODM contract manufacturing.
④ Hydraulic / Electric-Hydraulic Rivet Nut Gun
A hydraulic rivet nut gun generates very high pulling forces through a hydraulic system, suitable for large-sized rivet nuts (e.g., M10 to M12) or high-strength fastening applications. Electric-hydraulic models use electric motors to drive hydraulic pumps, enabling fully automatic hydraulic riveting with precise control.
Structural Features:
Composed of hydraulic pumps, high-pressure cylinders, pulling rod systems, and control valves.
Electric models have built-in motors, eliminating the need for external compressed air.
Many units feature digital displays, torque adjustment, and preset program functions.
Constructed with industrial-grade aluminum or steel bodies for durability and impact resistance.
Advantages:
Extremely high pulling force: Suitable for stainless steel and large-sized rivet nuts (M8 to M12).
High precision control: Stroke or pressure can be preset for consistent riveting quality.
Strong automation capability: Compatible with PLCs and robotic systems for smart production lines.
Low vibration and noise: Especially for electric-hydraulic types, offering stable operation.
Lightweight operation: Compared to manual or pneumatic tools, electric-hydraulic reduces physical exertion.
Disadvantages:
High equipment cost: Typically used by professional or industrial clients.
Large footprint: Some models require external hydraulic pumps and take up space.
Complex maintenance: Hydraulic systems demand strict oil cleanliness and seal integrity.
Not suitable for small batch or repair work: Heavy-duty design and cost make it uneconomical.
Typical Applications:
Heavy industrial manufacturing, such as railway vehicles, construction machinery, and mining equipment.
Large sheet metal factories requiring high-strength or thick material fastening.
Automotive OEM production lines, e.g., truck and bus chassis assembly.
Precision industrial equipment manufacturing demanding consistent and strong joints.
Rivet Nut Gun Model Performance Comparison Table
| Comparison Item | Hand Rivet Nut Tool | Electric Rivet Nut Gun | Pneumatic Rivet Nut Gun | Hydraulic / Electric-Hydraulic Rivet Nut Gun |
|---|---|---|---|---|
| Suitable Volume | Low / Maintenance | Medium-Low Volume | Medium-High Volume | High Volume / Heavy Duty |
| Pulling Force Strength | ⭐⭐ | ⭐⭐⭐ | ⭐⭐⭐⭐ | ⭐⭐⭐⭐⭐ |
| Applicable Nut Sizes | M3–M6 (some up to M8) | M3–M8 (some M10) | M3–M10 | M5–M12 (and above) |
| Ease of Operation | ⭐⭐ | ⭐⭐⭐⭐ | ⭐⭐⭐⭐ | ⭐⭐⭐ |
| Efficiency | ⭐⭐ | ⭐⭐⭐ | ⭐⭐⭐⭐ | ⭐⭐⭐⭐ |
| Operator Fatigue | High (physical effort) | Medium (light effort) | Low (light effort) | Low (mechanical assistance) |
| Installation Accuracy | General | Medium | High | High (force/stroke control) |
| Tool Cost | $ (lowest) | $$ | $$$ | $$$$ (highest) |
| Maintenance Complexity | Low | Medium | Medium-High | High (hydraulic + electrical) |
| Typical Use Scenarios | DIY, equipment repair | Small factories, light industry | Industrial assembly lines | Heavy machinery, heavy industry |
Summary Recommendations:
💡 Startups or maintenance work: Prefer Hand Rivet Nut Tools for their low cost and adaptability.
💡 Medium volume and light industry: Recommend Electric Rivet Nut Guns for higher efficiency and ease of use.
💡 Large volume production and assembly lines: Choose Pneumatic Rivet Nut Guns for stable high-efficiency operation.
💡 Large nut sizes or high-strength connections: Use Hydraulic / Electric-Hydraulic Rivet Nut Guns for maximum force and precision.
How To Use Rivet Nut Guns?

a. Riveting Operation Procedure
Step 1: Install the Mandrel and Select the Matching Nut
Based on the rivet nut size required (e.g., M5, M6, M8), install the appropriate threaded mandrel and nosepiece on the rivet nut gun.
Each nut size requires a different diameter and thread length mandrel; mismatched sizes may cause failure or damage.
Ensure the mandrel is securely fastened and does not loosen during operation.
Step 2: Thread the Nut onto the Mandrel
Screw the rivet nut clockwise onto the mandrel until it is fully seated against the nosepiece.
Ensure the nut is flush with the gun head to prevent misalignment.
Lightly tighten by hand to ensure no play or gaps.
Step 3: Insert the Nut into the Pre-Drilled Hole
Pre-drill a properly sized hole in the workpiece (metal plate, aluminum profile, plastic component, etc.); the hole should be slightly larger than the nut body.
Insert the rivet nut and gun head vertically into the hole, with the nut flange resting flat on the material surface.
For countersunk nuts, ensure the hole is chamfered to match the nut’s angle so it can sit flush.
Step 4: Perform the Riveting Action
Depending on the gun type, operate as follows:
Manual tool: Squeeze the handles.
Electric tool: Press the button to engage the motor.
Pneumatic tool: Pull the trigger to activate the air cylinder.
Hydraulic tool: Engage the control system to automatically apply force.
The mandrel pulls backward, drawing the tail of the rivet nut inward.
The tail section undergoes plastic bulging deformation under the constraint of the nosepiece, pressing tightly against the material.
Once deformation completes, the nut is clamped securely between both sides of the workpiece.
Step 5: Retract the Mandrel and Complete Installation
After riveting, the mandrel automatically or manually retracts, and the mandrel is unscrewed from the nut.
Inspect that the nut is flush and tight on the material surface.
For countersunk nuts, confirm they sit perfectly flush without protrusion.
The process is complete, and the installed nut is ready for bolts or screws.
b. Force and Deformation Analysis of the Riveting Zone
The installation of a rivet nut is a controlled plastic deformation process, where axial tension is applied to the tail of the nut, causing it to deform under structural constraints and clamp securely. This involves tensile force, reaction force, and material flow mechanics, as outlined below:
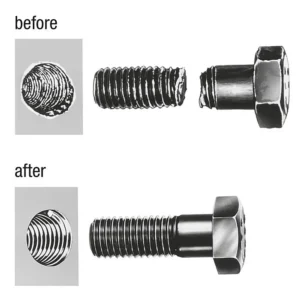
1. Initial State: Unformed (Pre-installed)
The rivet nut tail is cylindrical, with an intact internal thread.
After insertion into the pre-drilled hole, the nut flange rests on the material surface.
No force is applied yet; the nut has not deformed.
Force State:
No significant force. The nut merely contacts the material without clamping force.
2. Beginning of Riveting: Axial Force Applied
The gun’s mandrel pulls backward, applying axial tension through the nut’s internal thread.
The force transfers to the tail, causing gradual bulging deformation.
Simultaneously, the nut head resists movement by pressing against the surface, creating a reaction force.
Force State:
Axial force from the mandrel causes the tail to deform within constrained space.
Reaction force from the flange prevents rearward movement of the entire nut.
Tail undergoes axial tension + radial compression, entering the plastic flow phase.
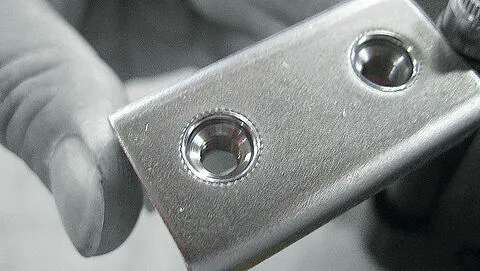
3. Plastic Deformation: Tail Expands and Folds Back
The tail yields and forms a flange or umbrella-like shape under the applied load.
The deformed area presses against the inner wall of the panel, forming an internal-external clamping mechanism.
A solid anchor structure is created after shaping.
Force State:
The tail creates a ring-shaped return structure, pressing on the material’s rear face.
Riveted zone experiences axial clamping, radial resistance, and shear stress.
This structure resists bolt torque and pull-out force.
4. Completion: System Stabilized and Ready for Bolt Insertion
Once riveting is done, the mandrel is removed, leaving the nut embedded.
Internal threads remain intact for bolt/screw assembly.
A permanent, reusable threaded connection point is formed.
Structural Characteristics:
External nut body mechanically locks to the material with no need for welding or adhesives.
Withstands tension, shear, and repeated assembly.
Deformed area creates a “compression shoulder + bulging flange” for long-term stability.
Summary of Structural Mechanics:
| Analysis Dimension | Explanation |
|---|---|
| Main Deformation Area | Rear section (tail) of the rivet nut |
| Core Force Mode | Axial tension + flange compression + bulging friction |
| Final Structure | Rear flange clamps inner side + front flange presses surface |
| Fixing Principle | Plastic deformation + double-sided clamping + frictional retention |
| Stability Advantage | No surface damage; reliable and reusable connection |
c. Key Points of Force Analysis
1. Axial Tensile Force (Tension from Mandrel)
Comes from the pulling system (manual, electric, pneumatic, or hydraulic).
Primary force throughout the process that pulls the tail outward.
Must be strong enough to bring the tail past yield strength into plastic deformation.
Insufficient force = poor deformation and weak connection; excessive force = risk of damage.
2. Flange Reaction Force (Head Support)
Comes from the material resisting inward from the flange surface.
Key balancing force in the system to keep the nut in position.
Ensures deformation is localized at the tail, not the head.
If the material is too soft or surface not flush, the nut may sink or shift.
3. Radial Expansion Force (Plastic Bulging of Tail)
Driven by axial tension, the tail compresses axially and expands radially.
Metal flows along predefined geometry, forming an outward flange gripping the inner panel.
This process involves strain hardening, increasing overall strength and retention.
Weak or thin material = incomplete deformation or risk of tearing.
4. Support and Shear Resistance from the Panel
The base material must be strong enough to withstand counterforces during riveting.
After installation, the nut relies on the material to resist pull and shear from screws.
If the material is too thin, hole is too large, or strength is low, issues may include:
Nut loosening
Hole tearing
Joint failure
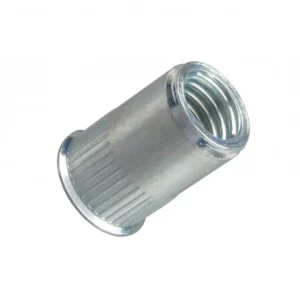
5. Frictional Resistance (Anti-Rotation)
After installation, friction between the nut flange and surface creates normal pressure × friction coefficient.
This friction prevents rotation or spinning of the nut during bolt tightening or vibration.
Anti-rotation designs (e.g., hex, knurled bodies) further enhance performance.
Summary Diagram: Force Path
Rivet Gun → Mandrel (applies axial pull) → Tail plastically deforms → Expands behind the panel
↓ ↑
Nut flange (pressed by panel surface) ← Panel provides reaction support
FAQs
Rivet nut spin-out during installation is usually caused by:
Oversized or overly smooth holes, resulting in insufficient friction;
Using non-anti-rotation nuts (e.g., smooth round body nuts instead of knurled or hex types);
Insufficient pulling force or improper installation, leading to incomplete deformation.
Solutions:
Use rivet nuts with knurled, hexagonal, or serrated bodies for mechanical grip;
Ensure pre-drilled hole size matches the nut specification (refer to manufacturer’s recommendations);
Increase surface friction with light sandblasting or anti-slip coatings;
Set proper pulling force and make sure the stroke is sufficient to complete deformation;
For critical parts, consider adding a rear washer to enhance clamping performance.
2. How to Adjust Pulling Force or Stroke?
The pulling force and stroke settings of rivet nut guns are essential for proper installation and vary by tool type:
Manual Tools:
Most manual rivet nut guns adjust stroke by changing the thread length on the mandrel (adjusting the nut on the mandrel);
After threading the rivet nut onto the tool, adjust until the handles complete the deformation with proper force;
Note: Too short a stroke causes weak riveting; too long may damage the workpiece.
Electric / Pneumatic Tools:
These tools may have adjustment knobs, digital panels, or built-in control systems allowing:
Pulling force (torque);
Stroke length (mm);
Time control (some models);
It is advisable to perform 1–2 test rivets and observe the deformation to fine-tune parameters.
Recommendation:
Different rivet nut types and materials require separate testing. Avoid using one universal setting for all to prevent faulty installations.
3. How to Avoid Misalignment During Installation?
A tilted rivet nut leads to uneven force distribution, insufficient deformation, and weak joints.
Precautions:
Ensure hole drilling is vertical — the drill must be perpendicular to the material surface;
Keep the rivet nut gun aligned vertically with the hole during installation;
For pneumatic or electric tools, use two-handed operation for balance;
For thin or soft materials, use a positioning sleeve or spacer to assist in vertical alignment;
Before pulling, confirm that the nut is fully inserted and flush with the base surface.
4. How to Maintain and Service Rivet Nut Guns?
As high-frequency tools, rivet nut guns require regular maintenance to ensure performance and extend lifespan.
Routine Maintenance Tips:
Daily after use:
Clean the tool surface to remove dust and grease;
Check the mandrel for bending, wear, or cracks;
Weekly check:
Lubricate moving parts (especially gears and shafts);
Tighten screws to prevent loosening;
Replace worn components (e.g., mandrel, nosepiece);
For pneumatic tools:
Add special pneumatic oil before each use;
Regularly drain moisture and clean the air inlet;
For electric tools:
Monitor battery level and ensure good connection at terminals;
Avoid overloading to prevent motor burnout;
Storage:
Keep in a dry, clean, rust-proof environment, and avoid impact damage.
Summary
Rivet nut guns come in various types — manual, electric, pneumatic, and hydraulic — to suit different applications and production needs.
Understanding their structure and working principles helps ensure standardized operation, improving joint stability and installation consistency.
In scenarios where tapping is impossible, only one-sided access is available, or space is limited, rivet nut guns provide an efficient and reliable threaded fastening solution — widely used in sheet metal fabrication, mechanical manufacturing, home appliance assembly, and automotive repair industries.
Do You Have Any Questions?
Let Us Solve Your Problem
Why Choose Rivetfix

As a leading fastener manufacturer in China with more than 15 years in the industry, Rivetfix are committed to providing first-class quality fasteners and responsive services to the world. We offers a wide range of rivet nuts and clinch nuts designed to meet the unique demands of your projects. Rivetfix ensures you have the right solution for every application. Choose Rivetfix for versatile, cost-effective, and durable fastening solutions tailored to your specific needs. In addition, we can also provide customized rivet nuts service and clinch nuts according to your requirements.
Contact us now for more information and customization options on Rivet Nuts!
Get High Quality Rivet Nuts Quote!

Send Your Rivet Nut Request
For more than 20 years, Rivetfix has helped customers solve many rivet nuts sourcing needs and technical challenges.
Have a question? Contact us and we’ll provide you with the perfect solution.