How To Remove Threaded Inserts?
Leading Threaded Inserts Manufacturer and Supplier in China
In the process of mechanical assembly and maintenance, threaded inserts are widely used due to their excellent connection performance. How to remove threaded inserts has become a focus of concern for many engineers and technicians. Correct disassembly avoids damage to the base material. In addition, it also ensures the smooth progress of subsequent maintenance and reinstallation. This article will provide a detailed and professional explanation on how to remove threaded inserts. To help you master safe and efficient disassembly techniques, improve maintenance efficiency and equipment lifespan.
Table of Contents
What Are Threaded Inserts and When Do You Need to Remove Them?
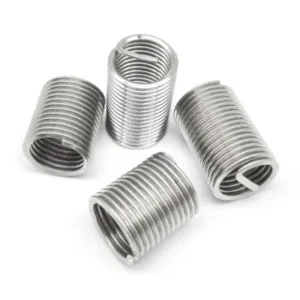
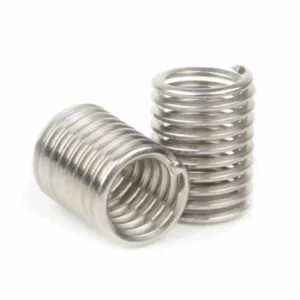
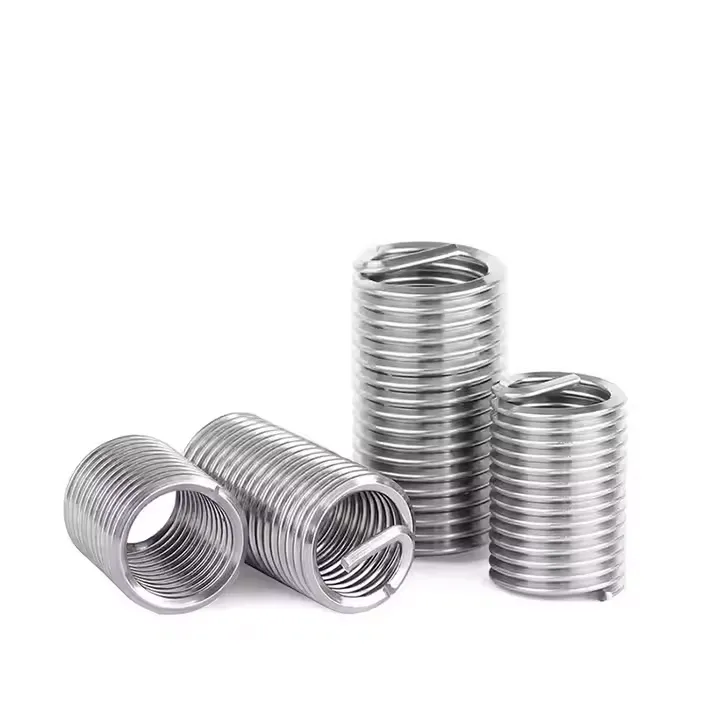
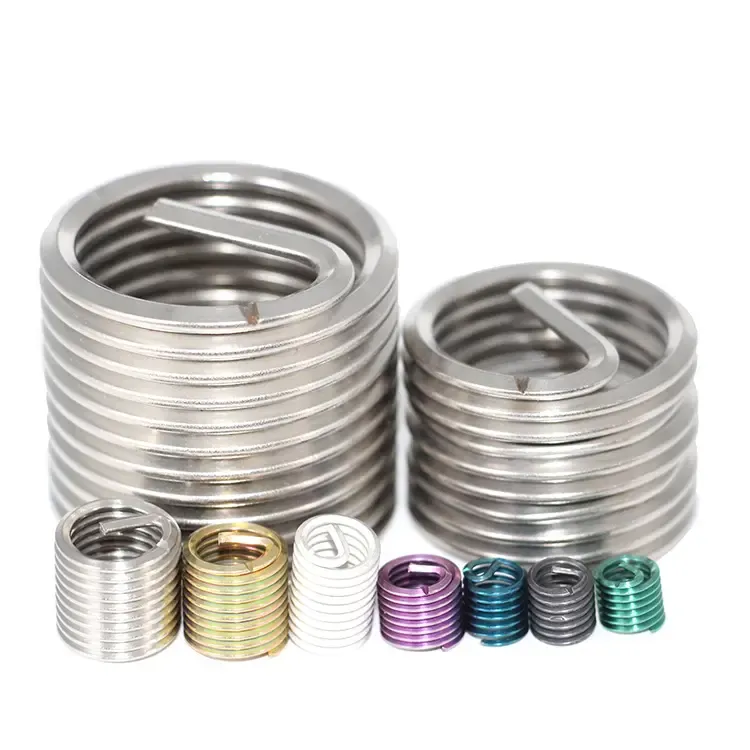
Threaded Inserts are a type of fastening element that is embedded within soft or hard substrates (such as wood, plastic, or metal). They have internal threads and provide stable installation holes for screws. This structure is widely used in fields such as furniture, molds, automobiles, and electronic equipment, especially in connection scenarios where frequent disassembly or high load-bearing requirements are present. In such cases, threaded inserts can significantly enhance connection strength and durability.
Although the threaded inserts are designed for long-term use, in the following typical situations, you may need to remove them:
- Installation Error: The position of the insert is off, the size does not match, or the assembly direction is reversed, which affects the overall structural accuracy;
- Thread Damage: Due to frequent use or external force, the internal threads become loose or break, and the screws cannot be fixed any longer;
- Change of Insert Type: If you need to replace the hot-pressed insert with a threaded insert, or use inserts of different materials and specifications;
- Structural Modification or Repair: During product updates or repairs, old inserts need to be removed to adjust the hole positions or upgrade components;
- Reusing Insert Holes: In some applications, it is desired to reuse the original installation holes. In this case, the old inserts must be removed first.
Understanding the scenarios and reasons for removing threaded inserts is helpful in choosing the appropriate method, avoiding damage to the substrate, and ensuring the reliability of subsequent installation.
Can Threaded Inserts Be Removed Without Damage?
In many practical applications, one of the issues that users are concerned about is: Can the threaded inserts be removed without damaging the substrate? The answer depends on the type of the insert, the installation method, and the material of the substrate. Especially in soft materials such as wood and plastic, if appropriate tools and methods are adopted, certain threaded inserts can be removed without causing damage.
Cases Where Removal Can Be Done Without Damage
- Reversible structure inserts: For example, the external thread type (such as heat-melt inserts, wood-threaded inserts) is designed with a reversible pull-out function. As long as the substrate is not severely deformed, it can generally be removed by using an internal hex key or an external thread sleeve.
- Application in soft substrates: In materials such as wood and plastic, inserts usually rely on interference fit or heat-melt fixation. By using heating (for heat-melt inserts) or reverse-rotation tools (for self-tapping inserts), the inserts can be removed relatively easily without damaging the hole wall.
- Inserts without adhesive-assisted fixation: If no epoxy glue or strong locking agents are used during installation, it is easier to maintain the integrity of the substrate during removal.
Criteria for determining whether something can be reused
Even if the installation is successfully removed, it is necessary to consider the following factors to determine whether the insert can still be used:
- The insert itself is undamaged: The threads are intact, without any breakage or deformation;
- The installation holes remain unchanged: The hole diameters have not expanded, and the threads have not been damaged;
- The insert is not affected by heat or corrosion: Especially for metal inserts, during the thermal removal process, they may deform or lose strength due to temperature changes;
- The material compatibility still meets the requirements: For example, if the insert was originally used for soft plastic, it is not recommended to directly install it into metal or hard substrates after removal.

Overall, not all threaded inserts can be removed without damage or reused. It is recommended to select the appropriate insertion type during installation and retain the disassembly mechanism (such as avoiding strong adhesion). This can make the operation during maintenance or structural adjustment more flexible and easier to operate. The next section will introduce several common disassembly methods.
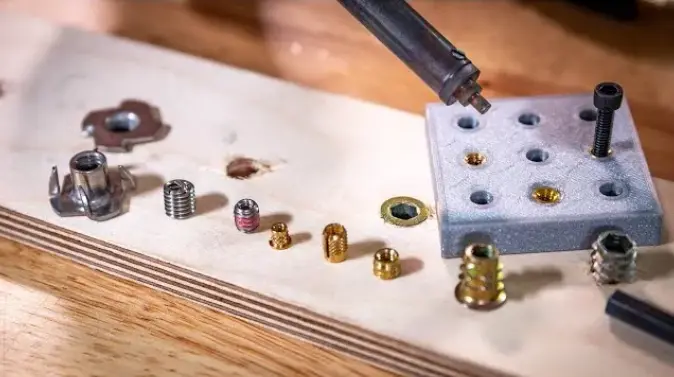
What Tools Required for Removing Threaded Inserts?
When removing threaded inserts, choosing the right tools is of vital importance. It not only enhances efficiency but also helps reduce the risk of damaging the substrate. Depending on the type of the insert and the installation material, common tools can be classified into basic manual tools, electric tools, and specialized disassembly tools.

Electric tools such as electric screwdrivers and electric drills with reverse drill bits can help quickly loosen fastened inserts. However, it is important to lower the speed to avoid overheating or damaging the substrate.
In terms of basic tools, such as a screwdriver with a single blade, a pair of needle-nose pliers, and a hexagonal wrench, are suitable for removing loose or shallowly embedded threaded inserts. They are particularly useful for disassembling inserts in soft materials such as wood or plastic.
Professional disassembly tools are suitable for more complex or tightly fastened inserts, such as:
- Screw Extractor: This tool is designed for embedded parts with damaged internal threads that cannot be easily unscrewed. It can grip the inner part through an anti-thread design and then unscrew it in the reverse direction.
- Heater or Hot Air Gun: For heat-melt or adhesive-type embedded parts (such as those used in plastic components), local heating can be applied to soften the surrounding materials, making it safe to pull out.
- Insert Puller: This is a specialized tool suitable for metal embedded parts. It usually securely clamps the embedded part through an internal locking structure and then pulls it out using a lever or threaded mechanism.
Step-by-Step Guide: How to Remove Threaded Inserts from Different Materials?
a. Removal of threaded inserts in wood
When removing threaded inserts from wood, it is necessary to fully consider the fiber structure and hardness of the wood to avoid damaging the substrate, and to ensure the integrity of the hole position after removal and the possibility of subsequent use.
Common Disassembly Methods:
1. Reverse Rotation Method
Use an internal hexagonal wrench or an appropriate screwdriver to rotate the insert counterclockwise and pull it out. This is the most common and least damaging method to the wood, and it is suitable for self-tapping and threaded inserts. During the operation, keep the tool perpendicular to the axis of the insert to avoid widening the hole or tearing the wood fibers due to oblique force.
2. Thermal Melting Assistance
For inserts installed using the hot-melt process, a hot air gun can be used to heat around the inserts, softening the adhesive in the wood and reducing the adhesion between the inserts and the wood, making it easier to remove the inserts. The temperature should be controlled within 120℃ during the heating process to prevent the wood from charing or deforming.
3. Pull-out Aid
When the insert does not have a rotatable structure, a special extraction tool can be used to slowly remove the insert by clamping or applying tension. During the extraction process, uniform force should be applied to avoid irregular tearing of the hole wall.
Notes:
- During the disassembly process, excessive force or violent operation with a crowbar should be avoided. This can prevent wood from cracking or deforming holes.
- Before disassembly, please use a sharp tool to remove the loose wood shavings around the hole. To ensure that the blade can be removed smoothly.
- If there is glue on the surface of the insert, it is recommended to moisten and soften it with a solvent (such as isopropyl alcohol) before removing it.
Risk Control:
- During the disassembly process, protective gloves should be worn to prevent injuries caused by tool slippage. After the disassembly is completed, the holes should be cleaned and repaired. If necessary, wood glue should be used to fill the holes to ensure the stability and aesthetics of subsequent installation or use.
- By using scientific methods and meticulous operations, the removal of threaded inserts from wood can not only ensure efficiency but also minimize the damage to the wood substrate to the greatest extent.
b. Removal of threaded inserts in plastic
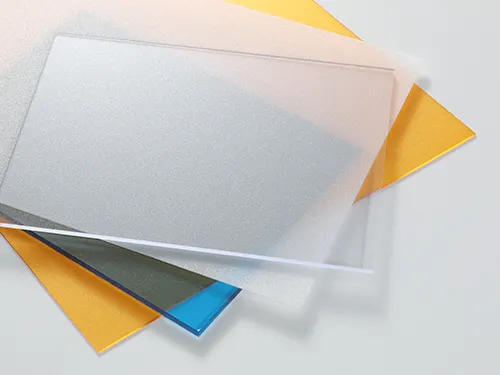
Due to their thermal sensitivity and relatively low mechanical strength, the removal process of threaded inserts is quite complicated. Therefore, it is necessary to operate carefully to avoid deformation or damage to the substrate. For different types of plastics (such as ABS, polycarbonate, nylon, etc.) and installation methods of the inserts, adopting appropriate removal methods is particularly crucial.
Common Disassembly Methods:
1. Thermal Softening Method
Thermal-melt type threaded inserts are usually removed by heating the plastic substrate to soften the insert, then pulling it out. Using a hot air gun or infrared heater, evenly heat the surrounding area of the insert, with the temperature controlled below the plastic’s heat resistance limit (for example, about 90℃ for ABS, and about 120℃ for nylon), to prevent the plastic from melting or deforming. The heating time should not be too long; typically 5-10 minutes is sufficient to soften the bonding material, and then use appropriate tools to rotate counterclockwise or gently pull out the insert.
Table: Different Plastic Heat Resistance Limits
| Plastic Type | Heat Resistance Limit (℃) | Notes |
|---|---|---|
| ABS | 90 | Common in consumer products |
| Nylon (PA) | 120 | Good mechanical strength |
| Polycarbonate (PC) | 115 | High impact resistance |
| Polypropylene (PP) | 100 | Flexible, chemical resistant |
| PVC | 80 | Used in pipes and fittings |
| Acrylic (PMMA) | 90 | Good optical clarity |
| POM (Acetal) | 100 | Low friction, durable |
2. Mechanical Reverse Rotation Method
For inserts with internal thread structure, an internal hexagonal wrench, screwdriver or electric drill can be used to rotate the insert in the opposite direction at low speed, causing it to be unscrewed counterclockwise. This method is applicable when the insert’s thread is not damaged and the plastic substrate has high strength. Make sure the tool is aligned with the axis to avoid widening of the hole or plastic tearing due to tilt.
3. Chemical Dissolution Method
When the inserts are fixed with epoxy glue or other strong adhesives, a suitable solvent (such as acetone or isopropanol) can be applied locally around the inserts to dissolve the glue layer and reduce the adhesion between the inserts and the plastic. This method is suitable for plastics that are not resistant to high temperatures or for parts that are sensitive to heat. When using, it is necessary to pay attention to the compatibility of the solvent with the plastic to avoid the plastic surface turning white or cracking due to the solvent.
Operation Suggestions:
- Before disassembly, it is recommended to test the heating temperature and time on discarded or unimportant plastic parts to prevent substrate damage during the actual disassembly process.
- During the disassembly process, apply force slowly to avoid sudden force application that causes plastic cracks.
- After disassembly, promptly clean up the remaining glue and the softened plastic parts, keep the holes clean, and prepare for the subsequent installation.
Risk Control:
- During the heat softening process, ensure proper ventilation to avoid inhaling harmful gases produced by heating.
- When using solvents, wear gloves and goggles to prevent chemical damage to the skin and eyes.
- Avoid using sharp tools to pry off the inserts to prevent scratching the plastic substrate and affecting the structural strength.
c. Removal of threaded inserts in metals
Metal materials usually have high hardness and strength. When installing threaded inserts, they are often fixed by methods such as press riveting, cold pressing or riveting, which makes the removal process quite difficult. Choosing an appropriate disassembly method not only ensures the smooth removal of the inserts, but also effectively avoids damage to the substrate and subsequent processing difficulties.
Common Disassembly Methods:
1. Screw Reverse Puller Method
For cases where the internal thread is damaged or the fastening force of the insert is strong, using a screw extractor is a common and efficient solution. This tool bites into the interior of the insert through a reverse thread design and uses counterclockwise rotation force to slowly remove the insert. During operation, it is necessary to ensure that the tool is aligned with the axis of the insert to avoid deformation of the hole wall due to lateral force.
2. Impact Demolition Method
Using an impact drill in combination with a reverse drill bit, apply impact force to gradually loosen the embedded parts, then use reverse rotation to remove the embedded parts. This method is suitable for embedded parts that are stuck by threads or severely rusted, but the workpiece needs to be fixed properly to prevent damage to the surrounding structure due to vibration.
3. Local Heating Method
For inserts fixed by cold pressing or riveting, local heating can cause the metal to expand and loosen the connection points. The heating temperature should be reasonably controlled based on the base material and the material of the insert. Generally, it should not exceed the annealing temperature range of the base material to avoid affecting the mechanical properties of the base material. The contraction force during cooling after heating helps loosen the inserts, and rotation or tapping can make the removal easier.
Table: Temperature Range for Annealing of Metal Substrates
| Material Type | Annealing Temperature Range (℃) | Notes |
|---|---|---|
| Low Carbon Steel | 550–700 | Common structural steel; annealing improves ductility and toughness |
| Stainless Steel (304) | 1000–1100 | Austenitic stainless steel; annealing relieves cold work stress |
| Aluminum Alloy (6xxx series) | 300–400 | Annealing softens material and improves ductility |
| Copper and Copper Alloys | 350–600 | Annealing removes work hardening, restores ductility |
| Magnesium Alloy | 300–400 | Prevents excessive hardening and restores plasticity |
4. Destructive Demolition Method
When other methods cannot be implemented, destructive demolition should be adopted. Common methods include drilling a hole at the center of the insert, using an impact tool to break and remove the insert, or drilling a larger hole to replace the new threaded hole. This method causes significant damage to the substrate and is usually used as a last resort.
Notes:
- Before dismantling, it is necessary to determine the material types and installation methods of the inserts and the base material to avoid using high temperatures or mechanical forces blindly.
- When using impact tools, ensure that the workpiece is securely clamped to prevent safety accidents caused by vibration.
- During the dismantling process, avoid causing severe deformation of the hole walls to facilitate subsequent repair or reinstallation.
Risk Control:
- During the disassembly process, safety goggles and gloves must be worn to prevent metal debris from splashing and injuring people.
- For valuable or delicate components, it is recommended to have professionals handle the operation to ensure the safety and quality of the disassembly process.
- After disassembly, the holes should be promptly inspected and repaired, such as re-drilling or using reinforcement measures, to ensure the structural strength.
What Are Common Problems and Fixes During Removal?
Question 1: Insertion piece rotates but cannot be pulled out
This situation is more likely to occur when there is a high friction between the insert and the substrate, or when the insert is bonded by glue. The solutions include:
- First, use a heating device (such as a hot air gun) to heat the area around the insert, softening the adhesive or the substrate and reducing friction resistance;
- Apply moderate pulling force while rotating in the opposite direction to ensure that the tool is perpendicular to the axis of the insert and prevent damage to the hole wall;
- If still unable to pull out, you can use a special extraction tool in combination, applying force evenly to avoid local stress concentration that could cause the substrate to crack.
Question 2: Damage to the Base Material
During the dismantling process, if excessive force is applied or improper operation is carried out, it is likely to cause the substrate to crack, deform or have its diameter enlarged, which will affect the subsequent use. The preventive and repair measures include:
- Select appropriate tools and avoid using violent tools such as crowbars;
- Before disassembling, protect the base material by covering it with soft padding or using clamps to secure the workpiece;
- After dismantling, repair the holes by filling and reinforcing them with wood glue, epoxy resin or metal reinforcement pieces to restore the strength of the base material.
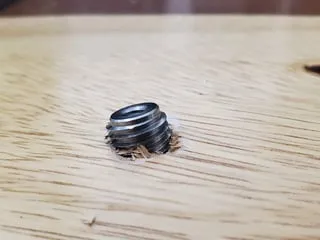
Question 3: Insertion piece breaks
The threaded inserts often break during disassembly, usually due to the fragile material, damaged threads, or excessive disassembly torque. The countermeasures include:
- Use the appropriate torque and dismantle slowly to avoid sudden force application;
- Use a professional screw extractor to gradually bite and reverse-rotate out the broken insert;
- If the breakage is severe and cannot be rotated out, a local drilling and fragmentation method can be adopted, combined with mechanical extraction or re-tapping to replace the new insert.
How to Repair or Replace Threaded Inserts After Removal?
After removing the threaded inserts, the holes usually experience wear, deformation or damage to the threads, requiring prompt and effective repair measures to ensure the firmness and safety of the subsequent connections. Here are several common and practical repair and replacement solutions:
1. Use larger-sized threaded inserts
When the original hole or thread is severely damaged, the diameter of the hole can be enlarged, and a threaded insert with a larger diameter one size larger can be used for installation. This solution enhances the connection strength and durability by increasing the contact area and the size of the insert. However, it is necessary to ensure that the base material is thick enough to support the larger insert, and the adjustment of the hole position will not affect the overall structural design.
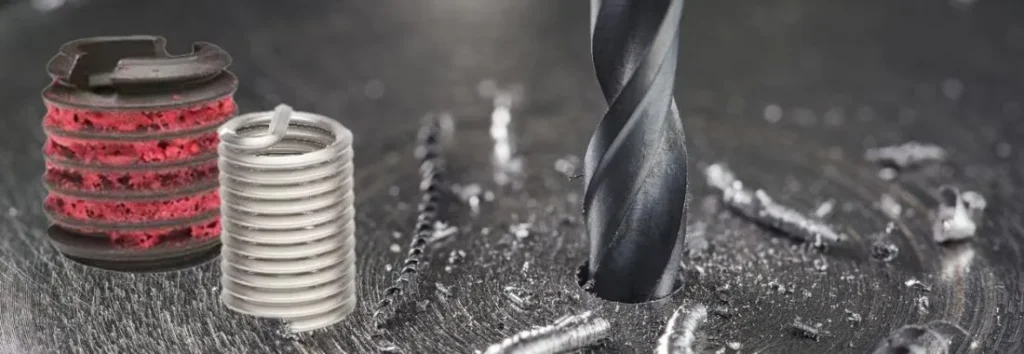
2. Thread Repair Kit or Epoxy Filling Reassembly
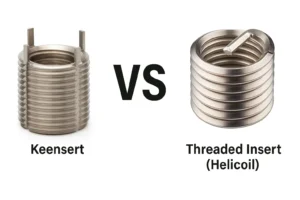
- Thread Repair Kit (such as Heli-Coil): Suitable for metal substrates. After drilling large threads, insert the repair thread kit and then use the original specification bolts for tightening to restore the thread function. It is simple and has a long-lasting effect.
- Epoxy Resin or Special Adhesive Filling: For wood, plastic, or mild thread damage, use high-strength epoxy resin to fill the holes and thread areas. After curing, re-drill and install the insert. This method is suitable for non-metal substrates, and the operation is simple but the bearing capacity is slightly lower.
3. Alternative Solutions
- Self-tapping Screws: For lighter loads, self-tapping screws can be used instead of thread inserts, eliminating the complex steps of installing the insert and achieving quick and efficient installation, but with lower bearing and durability.
- Insert Adhesive Fixation: In some cases, use structural adhesive to directly fix the insert into the hole, improving the connection stability. This is suitable for non-high load applications, but the disassembly is more difficult and is suitable for one-time installation.
Suggestion:
- When choosing a repair solution, one should comprehensively consider the type of substrate, the degree of damage, the structural load requirements, and the convenience of subsequent maintenance;
- For critical structures and high-load components, mechanical repair (such as repair sleeves and larger inserts) should be prioritized to ensure safety;
- For light-load or non-load-bearing parts, adhesive filling or self-tapping screws can be used instead, simplifying the maintenance process.
FAQs About How To Remove Threaded Inserts
① Can the threaded inserts be reused after removal?
The reusability depends on the material of the insert, the disassembly method and the degree of damage. Threaded inserts made of metal and with proper disassembly procedures can generally be reused, while thermosetting or adhesive inserts are usually not reusable after removal because the substrate and the surface of the insert may be damaged.
② How to remove the hot-melt inserts?
The hot melt insert mainly softens the plastic substrate through heating, thereby loosening the insert. Usually, a hot air gun is used to uniformly heat the insert area to the appropriate temperature (the temperature is controlled according to the type of plastic), and then the insert is gently removed by reversing rotation or using an extraction tool, to avoid damaging the substrate due to strong pulling.
③ What if the holes are damaged during the disassembly?
Damaged holes are quite common during the disassembly process. The following repair methods can be adopted:
- For metal holes, use a threaded repair kit (such as Heli-Coil) to restore the threads;
- For wood or plastic holes, use high-strength epoxy resin to fill them, then drill a new hole to install the insert;
- If the hole is too large, enlarge the diameter to install a larger-sized insert.
④ What if it can't be removed?
When the threaded insert rotates but is difficult to pull out, it is recommended to first heat it to soften or apply an appropriate solvent to reduce the adhesion force, and then use a special extraction tool to apply force evenly and slowly to disassemble it. If it is still difficult, consider using a destructive removal method, such as drilling and breaking before removing.
⑤ Can the soft material be removed without damaging the underlying surface?
Soft materials (such as wood and plastic) are more likely to damage the base material during removal, so special attention should be paid to this:
- Use appropriate tools and avoid using violent methods such as crowbars;
- Employ gentle methods such as heating to soften, rotating in the opposite direction, and pulling out;
- After disassembly, promptly repair the holes to ensure subsequent installation and structural stability.
Do You Have Any Questions?
Let Us Solve Your Problem
Why Choose Rivetfix for Threaded Insert Solutions?
By choosing Rivetfix as your partner for threaded fastener solutions, you will enjoy comprehensive disassembly and assembly support. Whether it’s standard products or custom-made items, we can provide professional technical consultation and tailor-made services based on your specific needs, ensuring that each project receives the best-matched fastener solution.
Rivetfix has a well-established global supply chain, which enables it to respond promptly to the purchasing needs of customers from all over the world. At the same time, it provides a complete range of installation and disassembly tools to offer a one-stop service experience. We are committed to helping customers enhance assembly efficiency and structural reliability through high-quality products and comprehensive technical support, and becoming your reliable long-term partner.
Get High Quality Rivet Nuts Quote!

Send Your Rivet Nut Request
For more than 20 years, Rivetfix has helped customers solve many rivet nuts sourcing needs and technical challenges.
Have a question? Contact us and we’ll provide you with the perfect solution.