How to Install Self-Clinching Nuts: Preparation & Steps
Leading Self-Clinching Fasteners Manufacturer and Supplier in China
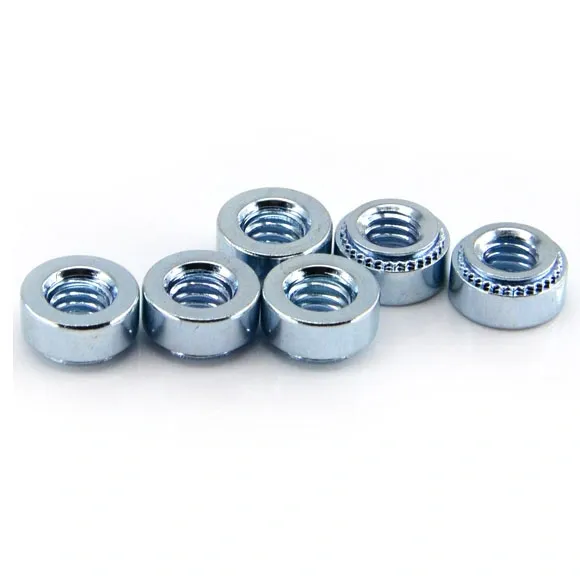
Learning how to install self-clinching nuts ensures durable, threaded fastening in sheet metal without welding. These nuts embed permanently into pre-drilled holes via controlled pressure, ideal for applications like electronics or machinery. Proper preparation—material selection, accurate drilling, and tool calibration—is critical. Follow this step-by-step guide to master installation techniques, avoid common pitfalls, and guarantee secure, vibration-resistant joints.
Table of Contents
What Preparations Are Needed to Install Self-Clinching Nuts?
1. Material Selection and Compatibility
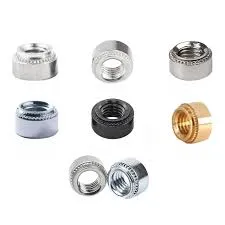
When different metals come into contact, galvanic corrosion may occur, affecting the fastener’s tightening effect and service life. Therefore, when selecting Self-Clinching Nuts, it’s essential to ensure that the material is compatible with the base material.
1. 1. Low Carbon Steel (Q235, SPCC)
- Recommended Nut Material: Zinc-Plated Carbon Steel, Stainless Steel
- Reason: Low carbon steel has moderate strength and is suitable for most self-clinching nuts. However, untreated carbon steel nuts are prone to rusting. Therefore, it is recommended to choose zinc-plated or stainless steel materials to improve corrosion resistance.
- Notes:
- Avoid using plain carbon steel nuts, as they are susceptible to rust due to moisture and environmental exposure, which may reduce the fastening effect.
- Choose zinc-plated carbon steel nuts with a plating thickness of ≥8μm to effectively extend service life.
- Stainless steel nuts are a better choice, especially in humid or corrosive environments, ensuring long-term stability.
1. 2. Stainless Steel (SUS304, SUS316)
- Recommended Nut Material: SUS304, SUS316
- Reason: Stainless steel base materials have good corrosion resistance, so it is essential to select the same or a higher-grade stainless steel self-clinching nut to prevent galvanic corrosion (the corrosion reaction caused by contact between different metals).
- Notes:
- Avoid using carbon steel nuts, as they can cause electrochemical corrosion, leading to rapid rusting of the nut and affecting the fastening effect.
- SUS316 is superior to SUS304. In humid, high-salt, or chemically corrosive environments (such as marine or chemical plant settings), SUS316 nuts are recommended for their superior corrosion resistance.
- Ensure that the nut material matches the hardness of the base material. Stainless steel is harder, so sufficient pressure should be applied during installation to avoid incomplete embedding, which may cause loosening.
1. 3. Aluminum Alloy (6061, 5052)
- Recommended Nut Material: Aluminum Self-Clinching Nuts or Stainless Steel Nuts
- Reason: Aluminum alloy base materials are relatively soft and prone to deformation during installation. Therefore, it is suitable to use lighter, moderately hard aluminum self-clinching nuts or high-strength stainless steel nuts to enhance the connection strength.
- Notes:
- Avoid excessive installation pressure. Since aluminum is softer, excessive clamping force can cause deformation or cracking of the base material. The pressure should be adjusted based on the thickness of the base material.
- Aluminum nuts are lightweight and have good corrosion resistance, making them suitable for lightweight and corrosion-resistant applications such as aerospace and electronic devices.
- Stainless steel nuts are stronger, but their higher hardness may affect installation performance. It is recommended to perform installation force testing before use.
1. 4. Galvanized Steel Plates (SGCC, DX51D+Z)
- Recommended Nut Material: Nickel-Plated or Zinc-Plated Self-Clinching Nuts
- Reason: Galvanized steel plates have a coating that provides some corrosion resistance. However, if the coating is damaged during installation, the rust resistance will decrease. Therefore, choosing nickel-plated or zinc-plated nuts better matches the coating and reduces the risk of corrosion.
- Notes:
- Avoid damaging the galvanized coating during installation, as damaged coatings will expose the steel plate to air or moisture, making it prone to corrosion.
- Preferably use nickel-plated nuts, as they have better corrosion resistance than zinc-plated nuts and are suitable for long-term use.
- Provide corrosion protection after installation, such as applying anti-rust oil or protective paint to prevent rusting or loosening of the nut in long-term humid environments.
2. Punching Accuracy Control
Self-Clinching Nuts are cold-pressed into metal sheets, making the precision of the installation hole size critical. If the hole diameter is too large, the nut may become loose or fall off; if the hole is too small, installation failure or damage to the base material may occur.
Recommended Punching Tolerances
- General Tolerance Requirement: The hole diameter tolerance should be controlled within ±0.05mm to ensure the nut’s tight fit during installation.
- Recommended Processing Methods:
- Laser Cutting (recommended, with accuracy up to ±0.02mm);
- CNC Drilling (suitable for small batches, with accuracy ±0.03mm);
- Die Punching (suitable for mass production, with accuracy ±0.05mm).
Common Issues and Solutions
When installing self-clinching nuts, improper hole diameter or surface treatment of the base material may affect the nut’s fastening effect. Below are detailed descriptions of common issues and their solutions:
1. Hole Diameter Too Large
- Symptoms:
- The self-clinching nut is loose in the hole and cannot be firmly pressed into the base material.
- Under load, the nut may fall off, reducing the connection strength and affecting the product’s service life.
- Causes:
- Loose control during punching, resulting in an oversized hole diameter.
- The selected nut model does not match the hole size of the base material.
- The base material is soft, causing the hole to expand or deform under pressure after installation.
- Solutions:
- Precise control of punching dimensions, with the recommended hole diameter tolerance controlled within ±0.05mm.
- Select the appropriate nut model by referring to the manufacturer’s standard hole size matching table to avoid loosening due to model mismatch.
- Optimize installation pressure to ensure the nut is evenly pressed in without affecting the surrounding material strength.
2. Hole Diameter Too Small
- Symptoms:
- The self-clinching nut is difficult to install or cannot be pressed into the hole.
- The base material may experience excessive force during installation, leading to cracks or deformation.
- Causes:
- The punching size was too small, failing to meet the nut’s fitting standards.
- The base material is too hard, preventing the nut from fully embedding during installation.
- Burrs or debris inside the hole affect the nut’s press-in performance.
- Solutions:
- Adjust the punching dimensions to ensure they meet standard specifications, preventing errors that hinder installation.
- Properly anneal hard base materials (such as stainless steel) to reduce hardness and improve nut press-fit effectiveness.
- Clean any debris inside the hole, using high-pressure air or cleaning processes to prevent residue from affecting the fastening effect.
3. Burrs at Hole Edges
- Symptoms:
- Burrs obstruct the nut from fully pressing in, affecting the fit.
- Uneven pressure on the nut may reduce fastening strength.
- Residual burrs can affect subsequent surface treatments, such as coating or plating.
- Causes:
- No deburring process after punching or drilling, leading to rough hole edges.
- Use of low-quality punching dies causing edge deformation or stretching.
- Fast laser cutting or drilling speeds creating excessive burr formation.
- Solutions:
- Use deburring processes, such as pickling, mechanical grinding, or ultrasonic cleaning, to remove burrs from the hole edges.
- Optimize punching dies by using high-precision molds to reduce burr formation and improve hole quality.
- Adjust processing parameters, such as lowering laser cutting speed or optimizing drilling tools, to minimize burr formation.
3. Crimping Equipment Preparation
The installation of self-clinching nuts is typically carried out using specialized presses or manual tools for cold-press installation. Different installation methods are suitable for various production requirements.
Common Installation Equipment and Their Suitable Applications
a. Hydraulic/Pneumatic Press
- Suitable Applications:
- Ideal for mass production, especially for automated assembly lines.
- Suitable for applications requiring high installation precision and efficiency, such as automotive manufacturing and metalworking industries.
- Features:
- High efficiency and precision: Capable of completing a large number of self-clinching nut pressings in a short time, increasing production efficiency.
- High automation: Can be integrated with assembly lines and robotic systems for smart production, reducing human error.
- Adjustable pressure parameters: Ensures secure nut installation, avoiding material deformation or nut loosening due to excessive or insufficient pressure.
- Suitable Businesses:
- Large manufacturing enterprises and factories that need to install nuts in bulk.
b. Manual Hydraulic Riveting Press
- Suitable Applications:
- Suitable for small to medium batch production, where precise pressure control is needed, but full automation is not necessary.
- Commonly used in sheet metal processing, small equipment manufacturing, or custom product production.
- Features:
- Controllable pressure: The manual hydraulic system allows for precise control over the pressing force, reducing the risk of base material damage due to excessive pressure.
- Relatively low cost: Cheaper than fully automatic hydraulic presses, making it ideal for businesses with budget constraints while still needing high installation quality.
- Applicable to various materials: Can be used for crimping self-clinching nuts in stainless steel, aluminum alloy, carbon steel, and other materials.
- Suitable Businesses:
- Small to medium-sized manufacturers, sheet metal processing plants, and companies requiring custom production.
c. Manual Punching Tool
- Suitable Applications:
- Ideal for small batch production, on-site repairs, or emergency installations.
- Personal workshops, small repair stations, or situations that don’t require heavy-duty usage.
- Features:
- Simple operation and portability: No complex setup required, allowing for manual crimping of nuts whenever necessary.
- Low cost: Compared to hydraulic or pneumatic equipment, manual tools are affordable, making them suitable for budget-conscious situations.
- Lower efficiency: Fully dependent on manual operation, making it more suitable for small batch or temporary repair applications, not for mass production.
- Suitable Businesses/Individuals:
- Maintenance engineers, DIY enthusiasts, small processing factories, laboratories, etc.
How to Choose the Right Installation Equipment?
- For mass production needs: It is recommended to choose a hydraulic/pneumatic press, which offers efficient, stable, and controllable installation results.
- For small to medium batch production: A manual hydraulic riveting press is a good option, offering precise pressure control without excessive production costs.
- For small batch installations or on-site repairs: Manual punching tools are an economical and practical choice, especially for flexible operation needs.
4. Impact of Surface Treatment on Installing Self-Clinching Nuts
When installing self-clinching nuts on metal substrates, the surface treatment method may affect the nut’s crimping quality, installation depth, and thread compatibility. Therefore, before installation, it is important to consider the potential issues that different surface treatments may cause and take corresponding measures to address them.
1. Electrophoretic Coating
- Potential Issues:
- Due to the strong fluidity of electrophoretic coatings, during the application process, the coating may enter the threads, leading to thread blockage, which affects thread engagement and installation.
- Countermeasures:
- Pre-shield the threads: Use thread protectors or special masking materials before spraying to prevent coating from entering the thread area.
- Post-spraying cleaning: After spraying, use re-tapping or coating-removal thread gauges to clean the threads and ensure their smoothness.
2. Powder Coating
- Potential Issues:
- Powder coating is typically thicker than electrophoretic coatings, which may result in insufficient installation depth for the self-clinching nut, affecting the fastening effect.
- Countermeasures:
- Allow for appropriate installation clearance: Consider the coating thickness during design, and adjust the nut’s crimping position or increase the space on the substrate.
- Local cleaning after spraying: Use sandpaper, solvents, or light grinding to remove the coating in areas that affect installation.
3. Zinc/Nickel Plating
- Potential Issues:
- Plating thickness may affect the crimping effect of self-clinching nuts, especially when the plating is too thick, causing the nut to fail to embed fully into the substrate and affecting the locking strength.
- Compatibility between different metal coatings: For example, a zinc layer may cause galvanic corrosion when in contact with certain types of stainless steel nuts.
- Countermeasures:
- Select compatible nut materials: For example, use zinc-plated nuts on zinc-coated steel, or stainless steel nuts on stainless steel substrates to reduce corrosion issues caused by material mismatch.
- Control plating thickness: Ensure that the coating does not interfere with the crimping process by choosing thinner plating processes, such as zinc plating with passivation or low-thickness nickel plating, to minimize installation impact.
How to Install Self-Clinching Nuts?
1. Align the Installation Hole
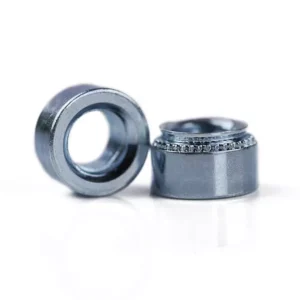
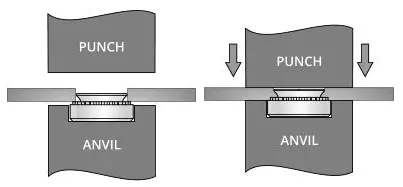
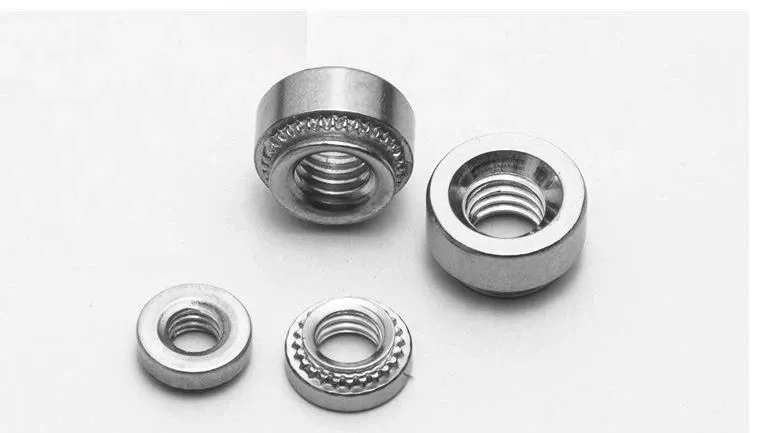
- Place the self-clinching nut into the punched hole, ensuring that the nut’s serrated edges face the metal base material.
- Ensure that the nut aligns perfectly with the base material, with no tilting or misalignment.
2. Apply the Appropriate Crimping Force
- Use a press machine or manual tool to apply force and press the nut into the base material.
- The pressure should be sufficient to embed the nut’s serrated edges into the metal surface without damaging the base material.
Table: Recommended Crimping Force Guidelines
| Nut Size | Recommended Crimping Force (kN) | Applicable Steel Plate Thickness (mm) |
| M3 | 2.5–3.0 | ≥0.8mm |
| M4 | 3.0–3.5 | ≥1.0mm |
| M6 | 4.0–4.5 | ≥1.5mm |
| M8 | 5.5–6.0 | ≥2.0mm |
*Specific pressure depends on the yield strength of the steel.
Note:
- Excessive Pressure → May cause deformation of the base material or damage to the nut.
- Solution: Set the crimping force according to the yield strength of the steel.
- Insufficient Pressure → May lead to the nut not being fully secured, increasing the risk of rotation or loosening.
- Solution: Use the appropriate press equipment to ensure the nut is fully embedded.
- Ensure that the press machine dies match the nut size to avoid accidental damage.
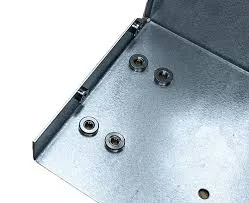
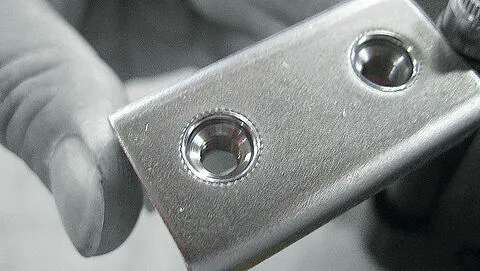
3. Ensure Crimping Strength
- Check that the nut is fully embedded into the base material’s surface, with no gaps or looseness.
- Screw in a bolt to test the thread matching and ensure that the nut remains stationary and secure after installation.
Do You Have Any Questions?
Let Us Solve Your Problem
What Are the Common Installation Mistakes?
Common Installation Mistakes and How to Avoid Them
1. Incorrect Hole Size
- Issue: If the hole is too large or too small, the self-clinching nut may not be securely fixed.
- Solution: Ensure that the hole size matches the specifications of the nut. Maintain tight tolerance (usually ±0.05mm) and use appropriate equipment for hole processing.
2. Failure to Remove Burrs from Hole Edges
- Issue: Burrs on the edges of the hole can affect the crimping effect of the nut, weakening the connection.
- Solution: After hole processing, remove burrs to ensure a smooth contact surface. This can be done through deburring processes such as pickling or grinding.
3. Improper Pressure Control
- Issue: Insufficient pressure during crimping may cause the nut to be insecurely installed, while excessive pressure can damage the base material or deform the nut.
- Solution: Set the appropriate crimping pressure based on the material and thickness of the nut and base material. For example, a pressure of 3.5kN is recommended for Q235 steel.
4. Choosing Incompatible Nut Materials
- Issue: Using a nut material that is incompatible with the base material may lead to corrosion, poor contact, or galvanic corrosion.
- Solution: Choose a nut material that is compatible with the base material, such as stainless steel nuts for stainless steel base material, or aluminum nuts for aluminum base materials.
5. Ignoring Surface Coating Issues
- Issue: Surface coatings on the base material (such as electrophoretic coatings or powder coatings) can affect the nut’s installation depth or cause thread blockages.
- Solution: Allow for appropriate installation clearance before coating, or clean the coating after spraying to avoid affecting the nut installation.
Maintenance Recommendations
1. Regularly Check Tightening
Periodically inspect the self-clinching nuts to ensure they remain securely fastened, especially in high-vibration or fluctuating load environments. It is recommended to check the fastenings every 6 months, particularly in high-pressure applications.
2. Avoid Over-Tightening
Avoid over-tightening the nuts, as it can cause deformation of the base material or damage the nut, reducing its lifespan. Over-tightening may lead to material deformation.
3. Proper Cleaning
Regularly clean the nut and base material surfaces to remove dirt or corrosion, maintaining the strength and reliability of the connection. Cleaning should be done every 3-6 months, especially in harsh environments.
4. Regular Inspection of Installation Tools
Keep installation tools in good condition by regularly inspecting and maintaining them. Ensure that the tools’ precision remains high to prevent installation issues.
FAQs - How to Install Self-Clinching Nuts
Q1: Can self-clinching nuts be reused after removal?
No, they cannot be reused. Removal may damage the base material and the nut structure, affecting the effectiveness of subsequent fastening.
Q2: Can self-clinching nuts be installed on plastics or composite materials?
It is not recommended to use self-clinching nuts on plastic or composite materials. These materials are too soft and may not withstand the required pressure during installation.
Q3: What should I do if I find that the screw doesn't fit after installation?
Check if the threads are damaged due to excessive pressure or if the hole size does not meet the specifications. Ensure that the hole tolerance and surface treatment are correct.
Q4: Can self-clinching nuts be installed on coated surfaces (e.g., paint or electrophoretic coating)?
Yes, they can be installed, but you need to allow enough installation clearance and clean the threaded area after coating to avoid coating blocking the threads.
Q5: Are self-clinching nuts suitable for high-temperature environments?
The temperature range for self-clinching nuts depends on the material. For high-temperature environments, select nuts made from heat-resistant materials (such as stainless steel or special alloys) to ensure long-term stability.
Do You Have Any Questions?
Let Us Solve Your Problem

With over 15 years of expertise in fastener manufacturing, Rivetfix has become a trusted global PEM fasteners supplier. Our team of 200+ skilled workers and 40+ sales professionals ensures reliable service and consistent supply.
Partnering with Rivetfix means access to top-quality fasteners, cost-saving solutions, and custom designs. We focus on boosting your efficiency, enhancing product durability, and providing on-time delivery. Count on our expert support and continuous innovation for your fastening needs. Choose Rivetfix for premium PEM fasteners and more!
Get High Quality Rivet Nuts Quote!

Send Your Rivet Nut Request
For more than 20 years, Rivetfix has helped customers solve many rivet nuts sourcing needs and technical challenges.
Have a question? Contact us and we’ll provide you with the perfect solution.