How to Install Rivet Nuts in Metal
Leading Rivet Nut Manufacturer and Supplier in China
Installing rivet nuts in metal can provide a strong, reliable threaded connection for various applications. In this guide, we will walk you through the essential steps on how to install rivet nuts in metal, ensuring a secure and durable attachment for your projects.
Table of Contents
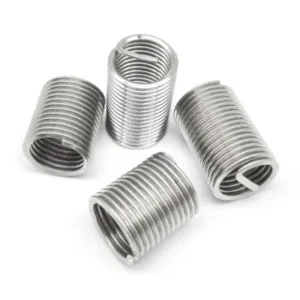
A rivet nut is a type of fastener used to create strong threaded connections on thin-walled materials or materials that cannot be directly threaded. It is installed using a specialized rivet nut tool (such as manual, pneumatic, or electric tools), and it forms a secure internal thread on the material’s surface.
The major advantage of a rivet nut is that it can be installed with a one-sided operation, meaning it does not require support or welding from the back, making it an ideal fastening solution in many industrial applications.
Structure and Working Principle of Rivet Nuts
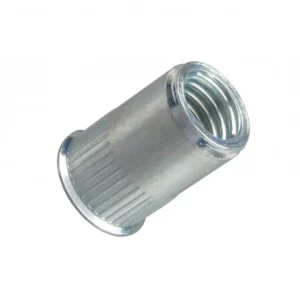
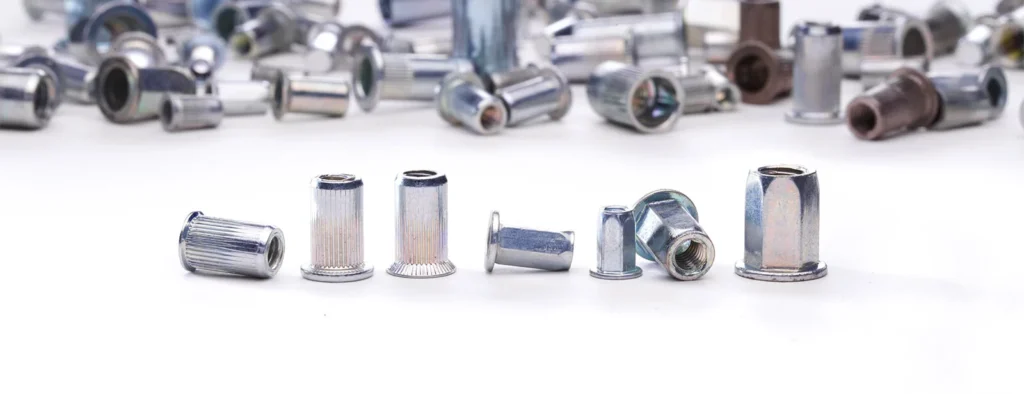
Rivet nuts are typically made of metals like stainless steel, aluminum alloy, or carbon steel. Their basic structure includes:
- Threaded Hole: Used to install bolts or screws, providing a stable internal thread.
- Riveting Part: Expands and deforms to create a tight connection with the base material.
- Head Shape: Common types include flat-head, small-head, and countersunk-head, designed to meet different installation needs.
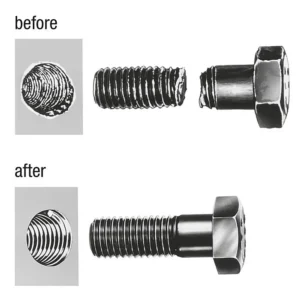
Working Principle:
- Drilling a Hole: A hole of the appropriate size is drilled in the base material.
- Inserting the Rivet Nut: The rivet nut is inserted into the drilled hole.
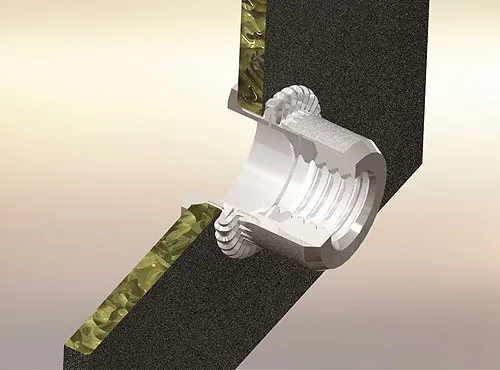
- Riveting and Fixing: A specialized rivet nut tool is used to apply pulling force, causing the rivet nut’s riveting part to expand outward and create a secure bond with the base material.
- Completing the Installation: After releasing the tool, the rivet nut forms a stable threaded hole that can be used to install bolts or other fasteners.
Why Use Rivet Nuts on Metal Sheets?
1. Solving the Problem of Threading Thin Metal Sheets
Metal sheets (such as steel, stainless steel, aluminum alloys) are often thin (1mm-3mm), making it difficult to create stable threads using traditional tapping. Direct threading would result in insufficient thread engagement, leading to poor holding power and a higher likelihood of stripping or detaching.
Rivet nuts can create strong internal threads on these thin metal sheets, allowing them to withstand the installation and removal of high-strength bolts.
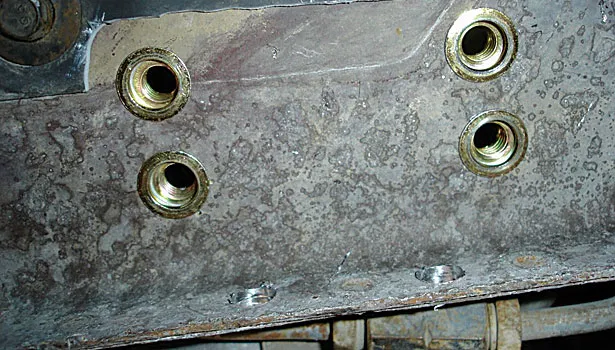
2. Allows One-Sided Installation (Blind Installation)
For enclosed structures or metal sheets where the back side is inaccessible (such as pipes, enclosures, or vehicle frames), traditional nuts cannot be fixed from the back, while rivet nuts can be installed from one side without needing to access the back, making assembly more convenient and efficient.
Application Scenarios:
- Automotive body panels, chassis structures
- Enclosures, electrical boxes, sheet metal equipment
- Aerospace structural components
3. Enhanced Pull-out and Anti-Rotation Strength
Ordinary nuts may loosen or rotate when subjected to force, but rivet nuts expand and deform to firmly bond with the base material, providing better pull-out and anti-rotation capabilities.
Especially knurled rivet nuts and hexagonal rivet nuts, with additional anti-rotation designs (the knurled surface increases friction, and the hexagonal shape prevents slippage), can effectively improve installation stability and prevent nut rotation or detachment.
Applicable Scenarios:
- Machinery manufacturing, preventing fastener loosening due to vibration
- Construction machinery, automotive, threaded connections subjected to high loads
4. No Welding Needed, Avoiding Heat-Affected Zones
Compared to welded nuts, rivet nuts do not require high-temperature processes, thus avoiding the damage caused by the heat-affected zone (HAZ), such as deformation, annealing, or localized hardness reduction of the metal sheet.
Applicable Scenarios:
- Aluminum alloys, stainless steel (difficult to weld, prone to deformation or corrosion)
- Coated metal sheets (welding can damage the surface coating, affecting corrosion resistance)
5. Suitable for Repeated Assembly and Maintenance
For metal sheets that require frequent disassembly or part replacement (such as equipment maintenance, automotive repairs), rivet nuts are more advantageous than traditional riveting methods (such as blind rivets), as they provide reusable threaded holes.
Applicable Scenarios:
- Electronic devices, enclosures, allowing repeated assembly and disassembly
- Maintenance applications (e.g., elevator maintenance, automotive part replacement)
6. Suitable for Various Materials and Environments
Rivet nuts are suitable for various metal materials (such as stainless steel, aluminum alloy, carbon steel) and can be used in different environments (such as high temperatures, high humidity, and vibration).
Application Scenarios:
- Aerospace (lightweight aluminum alloy structures)
- Automotive manufacturing (steel structures connected with plastic parts)
- Industrial equipment (fixing stainless steel housings to sheet metal components)
Conclusion - Use Rivet Nuts on Metal Sheets
The main advantages of using rivet nuts on metal sheets include:
- Suitable for thin materials, providing reliable threads
- One-sided installation, suitable for enclosed structures
- Strong pull-out and anti-rotation strength, preventing loosening
- Avoiding welding, preserving material integrity
- Reusable for repeated assembly, facilitating maintenance
Do You Have Any Questions?
Let Us Solve Your Problem
What Preparations Are Needed to Install Rivet Nuts?
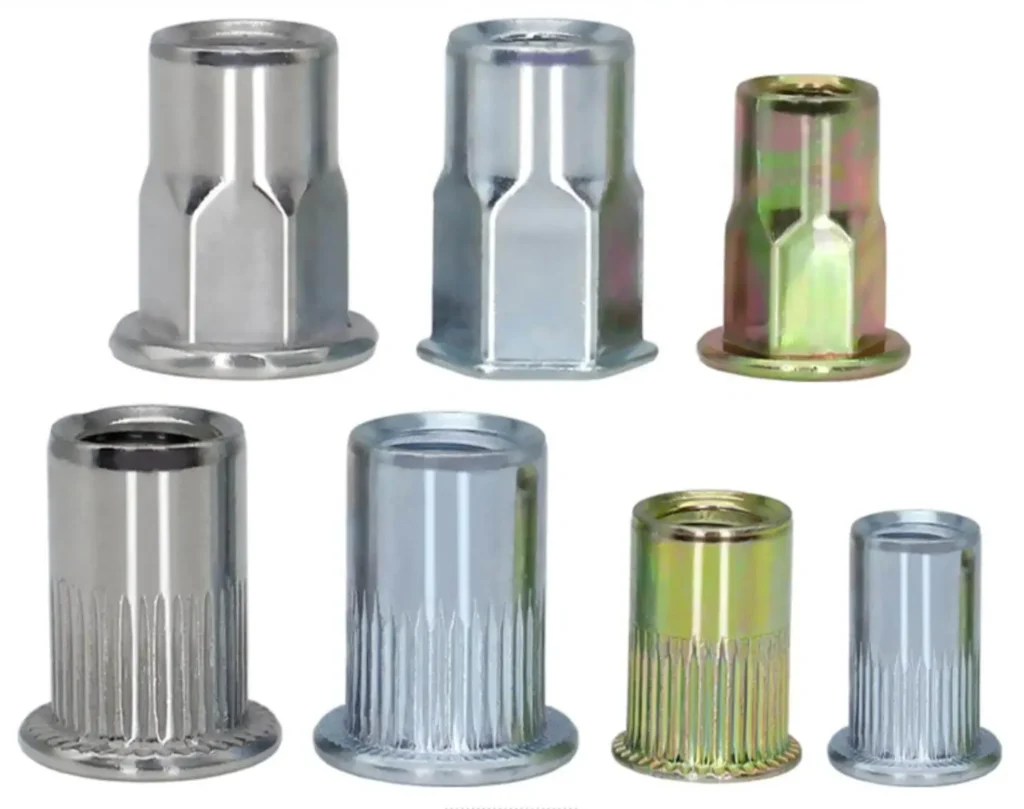
1. Choose the Right Type of Rivet Nut
Different types of rivet nuts are suitable for different base materials and application scenarios, so it is essential to determine the required rivet nut type before installation.
| Rivet Nut Type | Features | Application |
| Round Body Rivet Nut | Smooth surface, easy to install | Low load applications, suitable for soft materials like aluminum, plastic |
| Knurled Rivet Nut | Features external knurling to increase friction and prevent rotation | Suitable for medium load, such as steel, stainless steel |
| Hexagonal Rivet Nut | Hexagonal shape for better grip and anti-rotation | Suitable for high load and high anti-rotation applications |
| Blind Rivet Nut | Closed-end to prevent thread contamination | Suitable for dust-proof, waterproof, and corrosion-resistant environments |
| Jack Nut | Expands during installation for secure fixing in soft materials or hollow structures | Soft materials such as plastic, thin aluminum sheets |
- Light load or soft materials → Smooth Cylindrical or Jack Nut
- Medium load or metal sheets → Knurled Cylindrical Rivet Nut
- High load or vibration-prone environments → Hexagonal Rivet Nut
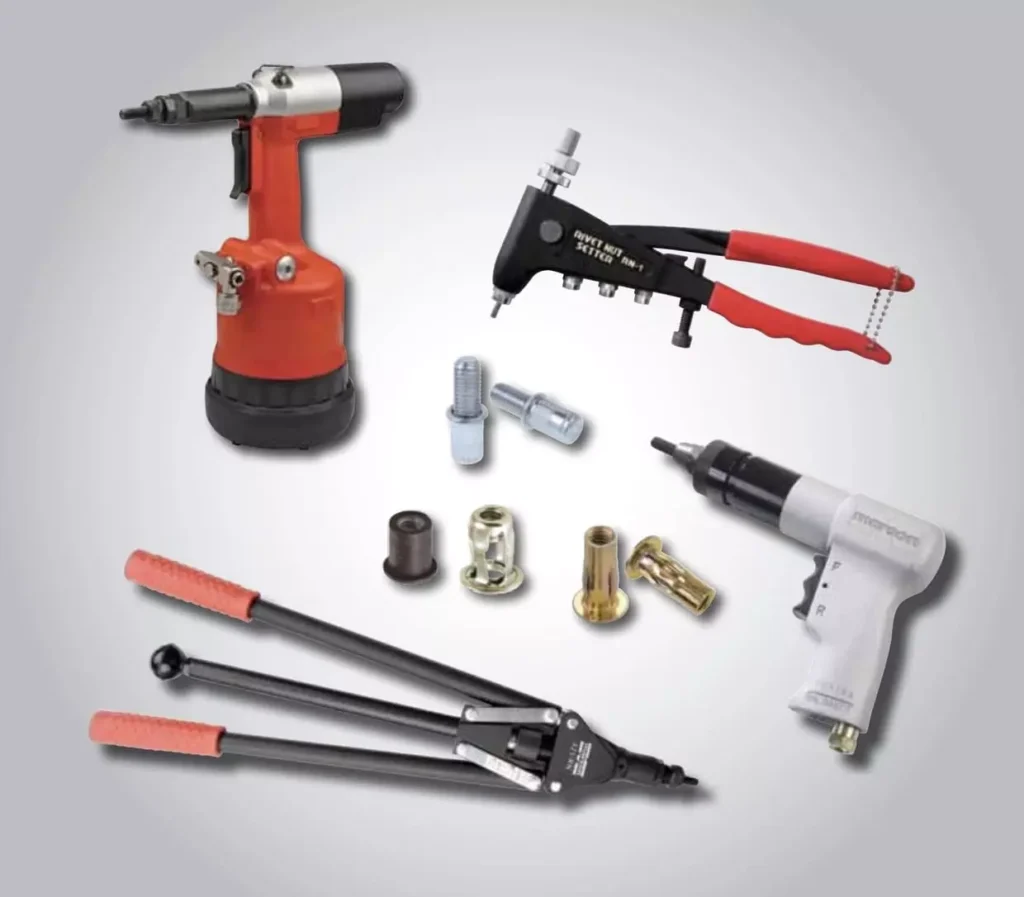
Rivet nut installation tools are divided into manual, pneumatic, electric, and hydraulic types, depending on the use requirements.
| Tool Type | Features | Application |
| Manual Rivet Nut Gun | Suitable for small batch installation, easy to operate | DIY, small repairs, low-strength applications |
| Pneumatic Rivet Nut Gun | Fast speed, suitable for mass production | Production lines, large-scale assembly |
| Electric Rivet Nut Gun | High power, suitable for multiple rivet nut sizes | Factory assembly, repair industries |
| Hydraulic Rivet Nut Gun | Provides extremely high pulling force, suitable for thick sheets and high-strength applications | Construction machinery, automotive manufacturing, large metal structures |
- Small batch, DIY → Manual Tool
- Medium-scale production → Electric or Pneumatic Tools
- Large-scale industrial applications → Hydraulic Tool
3. Ensure Correct Hole Size
Before installing a rivet nut, it’s essential to drill the hole and ensure the hole diameter matches the rivet nut specifications. Otherwise, the rivet nut may loosen or fail to expand properly.
Common Rivet Nut Hole Size Reference Chart:
| Rivet Nut Specification | Recommended Drill Hole Diameter |
| M4 | 6.0mm – 6.2mm |
| M5 | 7.0mm – 7.2mm |
| M6 | 9.0mm – 9.2mm |
| M8 | 11.0mm – 11.2mm |
| 1/4-20 | 9.07mm – 9.19mm |
Drilling Tips:
- Mark the center point before drilling to avoid off-center holes.
- Use appropriate drill speeds (200-300 rpm for metal sheets).
- For soft materials (plastics, aluminum alloys), use step drills to reduce cracking risk.
- Deburr the hole to ensure smooth edges and improve rivet nut fit.
How to Install Rivet Nuts in Metal?

Step① Drilling the Hole
1. Choose the Right Drill Bit Size
2. Adjust Drilling Speed and Pressure
- Thin Metal Sheets: Use a moderate drilling speed of 500–800 RPM to avoid tearing or deformation.
- Thick Metal Sheets: Use a low drilling speed of 200–300 RPM and apply steady pressure to avoid overheating and burr formation.
- Stainless Steel: Use HSS or cobalt drill bits and apply cutting oil to reduce temperature and tool wear.
3. Deburr and Clean the Hole
- Use a deburring tool or fine sandpaper to remove burrs from the hole edges.
- Clean the drilled area to remove metal shavings and dust.
- Keeping the hole edge smooth improves the rivet nut’s fit and ensures a secure attachment.
Step② Inserting the Rivet Nut
After drilling, you need to properly insert the rivet nut to ensure stability and security.
1. Choose the Right Rivet Nut Type
2. Correctly Insert the Rivet Nut
- Align the rivet nut with the drilled hole, ensuring it is flush with the base material.
- Avoid tilting the rivet nut when inserting it, as it can lead to improper fixation or uneven pressure distribution.
- Do not force the rivet nut into a hole that is too small, as it may damage the threads.
Tip: If the rivet nut is loose in the hole, try using a knurled rivet nut or a slightly larger size to increase friction.
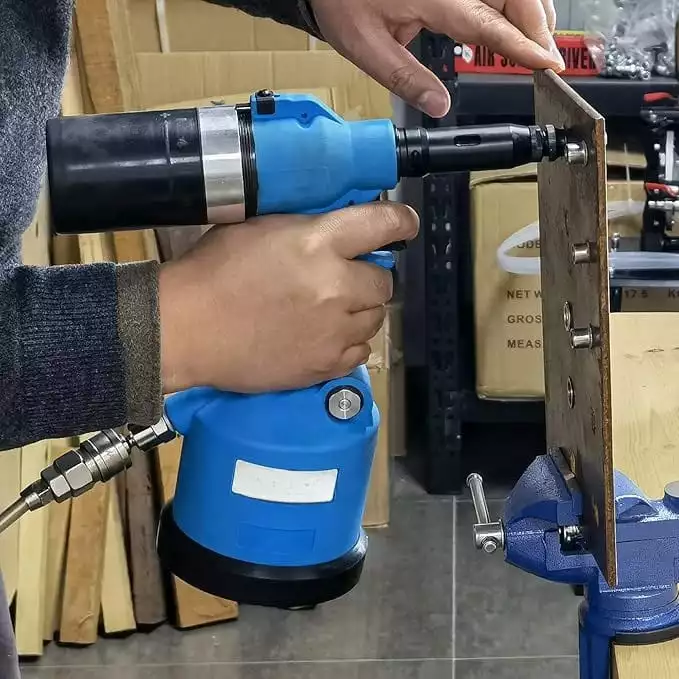
Step③ Using the Rivet Nut Tool
Rivet nuts require special tools for installation. These tools apply axial force to expand the rivet nut, creating a secure connection inside the metal.
1. Choose the Right Rivet Nut Tool
2. Correctly Install the Rivet Nut
- Insert the rivet nut into the tool’s mandrel, ensuring it is securely held.
- Align the tool with the drilled hole and insert the rivet nut, keeping the tool perpendicular.
- Apply force (manual tools require gripping the handles, pneumatic/electric tools require pressing the switch).
- The tool will pull the rivet nut’s mandrel, causing its rear end to expand and securely clamp the base material.
- Ensure complete expansion before releasing the tool and removing it.
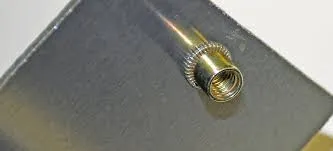
3. Remove the Tool and Check the Installation
- Rotate the tool counterclockwise to remove it from the rivet nut.
- Visually inspect that the rivet nut is fully flush with the base material, with no loosening or tilting.
- Screw a bolt into the rivet nut to test if the threads turn smoothly. If there’s resistance, you may need to adjust the installation pressure or check the threads.
- Apply slight pulling force to ensure the rivet nut is firmly attached. If it loosens, you may need to re-install it or adjust the hole size.
Common Issues and Solutions
- Rivet Nut Rotates → Use a knurled or hexagonal rivet nut.
- Rivet Nut Does Not Fully Expand → Increase tool pressure or check rivet nut size.
- Hole Diameter is Too Large → Use a larger rivet nut size or assist with adhesive for extra fixing.
Do You Have Any Questions?
Let Us Solve Your Problem
Common Problems and Solutions in Rivet Nut Installation
During the rivet nut installation process, you may encounter several common issues. If not addressed promptly, these problems can affect the rivet nut’s secure attachment or even cause material damage. Below are some common problems and their solutions:
1. Rivet Nut Rotates or Loosens
Cause:
- Hole Diameter Too Large: Insufficient friction between the rivet nut and the hole, causing it to rotate or loosen.
- Insufficient Clamping Force: The tool’s pressure is too low, preventing the rivet nut from expanding fully and securing properly.
Solution:
- Hole Diameter Too Large: Ensure the drill hole size matches the rivet nut specifications. If the hole is too large, re-drill with the correct size or use a slightly larger rivet nut.
- Insufficient Clamping Force: Check the tool’s pressure setting to ensure sufficient clamping force is applied to fully expand the rivet nut. For pneumatic or electric tools, set the pressure to 30-40 N·m (Newton-meter). For manual tools, make sure to apply sufficient force.
- Use Knurled or Hexagonal Rivet Nuts: If the hole size allows, use knurled or hexagonal rivet nuts, which offer stronger anti-rotation properties and can effectively prevent rotation or loosening.
2. Rivet Nut Does Not Fully Expand
Cause:
Insufficient Tool Pressure: The tool does not generate enough pulling force to fully expand the rivet nut.
Solution:
- Adjust Tool Pressure: Ensure the tool (pneumatic, electric, or hydraulic) is set to the correct pressure. For pneumatic tools, the pressure range should be 6-8 bar, and for rivet nuts like 1/4-20, the pressure should reach 1000-1500 N torque.
- Check Tool Compatibility: Make sure the tool is appropriately sized for the rivet nut. If the tool is too small, it may not generate sufficient pressure, leading to incomplete expansion.
- Switch to a Suitable Tool: If a manual tool cannot fully expand the rivet nut, consider using pneumatic or electric tools. These tools provide more uniform pulling force, ensuring full expansion of the rivet nut.
3. Material Damage or Cracking
Cause:
Improper Drilling Technique: Excessive drilling speed, high drilling pressure, or incorrect drill bit selection can damage, crack, or deform the metal or plastic base material.
Solution:
- Choose the Right Drill Bit and Speed:
- For metal sheets, use high-quality HSS drill bits and maintain a drilling speed of 200-300 RPM to minimize friction and overheating.
- For plastic and soft metals, use a step drill bit and drill at a slower speed to prevent cracking.
- Control Drilling Pressure: Avoid excessive pressure during drilling, especially on thin materials. It is recommended to keep the drilling torque between 5-8 N·m to effectively reduce material damage.
- Deburring: After drilling, use a deburring tool to clean the hole edges. This helps prevent burrs from affecting rivet nut installation and minimizes material damage.
- Use a Washer: For soft materials (such as plastic, thin aluminum alloys), use a washer during rivet nut installation to help distribute pressure and prevent material cracking.
FAQs - How to Install Rivet Nuts in Metal
1. What type of rivet nut should I use for metal?
For metal applications, it’s recommended to use knurled body rivet nuts or hexagonal rivet nuts. Knurled rivet nuts offer better resistance against rotation, while hexagonal rivet nuts provide the strongest grip, especially in high-stress applications.
2. How do I choose the right drill size for installing rivet nuts?
The drill size should match the specifications of the rivet nut you are using. For example:
- For a 1/4-20 rivet nut, use a hole diameter of 0.357″–0.362″ (9.07mm–9.19mm).
- For an M6 rivet nut, the hole diameter should be around 9.0mm–9.2mm. Always refer to the manufacturer’s specifications for the correct hole size.
3. Can I install rivet nuts in thin metal sheets?
Yes, you can install rivet nuts in thin metal sheets, but you should ensure that the material is not too weak to handle the expansion force of the rivet nut. Using knurled rivet nuts will help prevent rotation and provide a more secure attachment.
4. What tool should I use to install rivet nuts in metal?
You can use manual tools, pneumatic tools, or electric tools to install rivet nuts in metal. The choice of tool depends on the scale of your project. For small batches, manual tools are sufficient, while pneumatic and electric tools are more suitable for larger volumes.
5. How do I avoid damage to the metal while installing rivet nuts?
To avoid damaging the metal:
- Control the drilling speed: Use a slower speed for harder metals to avoid overheating and distortion.
- Use the right drill bit: For metal, use HSS drill bits to minimize wear and ensure clean holes.
- Check tool pressure: Ensure the installation tool is set at the correct pressure to avoid applying excessive force that could distort the metal.
Do You Have Any Questions?
Let Us Solve Your Problem
Why Choose Rivetfix

As a leading fastener manufacturer in China with more than 15 years in the industry, Rivetfix are committed to providing first-class quality fasteners and responsive services to the world.
Rivetfix offers a wide range of rivet nuts designed to meet the unique demands of your projects. With options like countersunk, flat, and hex heads, as well as knurled and round body types, Rivetfix ensures you have the right solution for every application. Choose Rivetfix for versatile, cost-effective, and durable fastening solutions tailored to your specific needs. In addition, we can also provide customized rivet nuts service according to your requirements.
Contact us for project advice and the latest rivet nut quote!
Get High Quality Rivet Nuts Quote!

Send Your Rivet Nut Request
For more than 20 years, Rivetfix has helped customers solve many rivet nuts sourcing needs and technical challenges.
Have a question? Contact us and we’ll provide you with the perfect solution.